
Today’s post is not the most exciting tutorial, but it is one I use ALL THE TIME while crafting. This post will walk you through how to use the Image Trace tool in Adobe Illustrator to quickly and easily make an SVG file from any photo or scanned drawing for cutting with your Cricut Machine, or for designing beautiful graphics.

{{ This post contains affiliate links. These links don’t cost you anything extra, but allow me to run this site and provide free content for you. You can read the full disclosure here.}}
Why You Should Make SVG Files For Cutting with Your Cricut
SVG files are what Cricut cutters (Maker, Explore, and Joy) use to cut from. When you upload a PNG or JPG to Cricut Design Space, Cricut will then change these to SVG. By uploading SVG files instead to Cricut Design Space, it eliminates the step where you walk through telling Cricut which lines to cut, it already knows!

How To Use Adobe Illustrator Image Trace Tool to Make SVG Files
Begin by deciding what it is you would like to turn into an SVG for cutting or tracing. Sometimes I use my own images (either shot on my iPhone and airdropped to my laptop or taken with my DSLR), other times I use free stock images from websites like Unsplash or Pexels.

This week I was inspired by my husband’s Monstera plant, the bold nature of the leaves are perfect for cutting on my Cricut Explore. I chose to look on Unsplash for some Monstera leaf images, and like expected, there were lots of options for me!
Preparing Your Image for Tracing
If you have an image where the only subject is what you would like to cut, you can download it to your computer directly.

In the case that the image has other content in it that you don’t want cut, I find it quickest to zoom into the subject I’d like to cut and screenshot that only (Command + Shift + 4 on a Mac computer, Windows key + Shift + S on a Windows computer). Or you can download the image and crop it down to your desired subject using your computer’s image editing software.

Setting Up Adobe Illustrator
Next, open up Adobe Illustration and create a new file. The size of your document does not matter.

Importing Your Image
Once you have your new document in Illustrator, you need to import your image. You can do this either by dragging the image from its location on your computer and dropping it into Illustrator, or you can go to “File > Place” and locate the image that way (see above image for a visual explanation).

Using the Image Trace Tool
When your image is imported, you want to make sure to select your image. This will bring up a tool option titled “Image Trace”. Click the Image trace tool and you will see your image turn into a black and white graphic.

To prepare the graphic to be exactly as you like it, click on the small downward arrow beside the “advanced” Title within the Image Trace tool box, then play around with the graphics Threshold, Paths, Corners, and Noise. You also want to make sure you have “Snap curves to lines” and “Ignore white” check marked.

In the upper bar where you had originally selected the Image Trace tool, there will now be an “Expand” option. Select Expand. This now turns your graphic into a scalable vector that can be saved as an SVG (Scalable Vector Graphic).
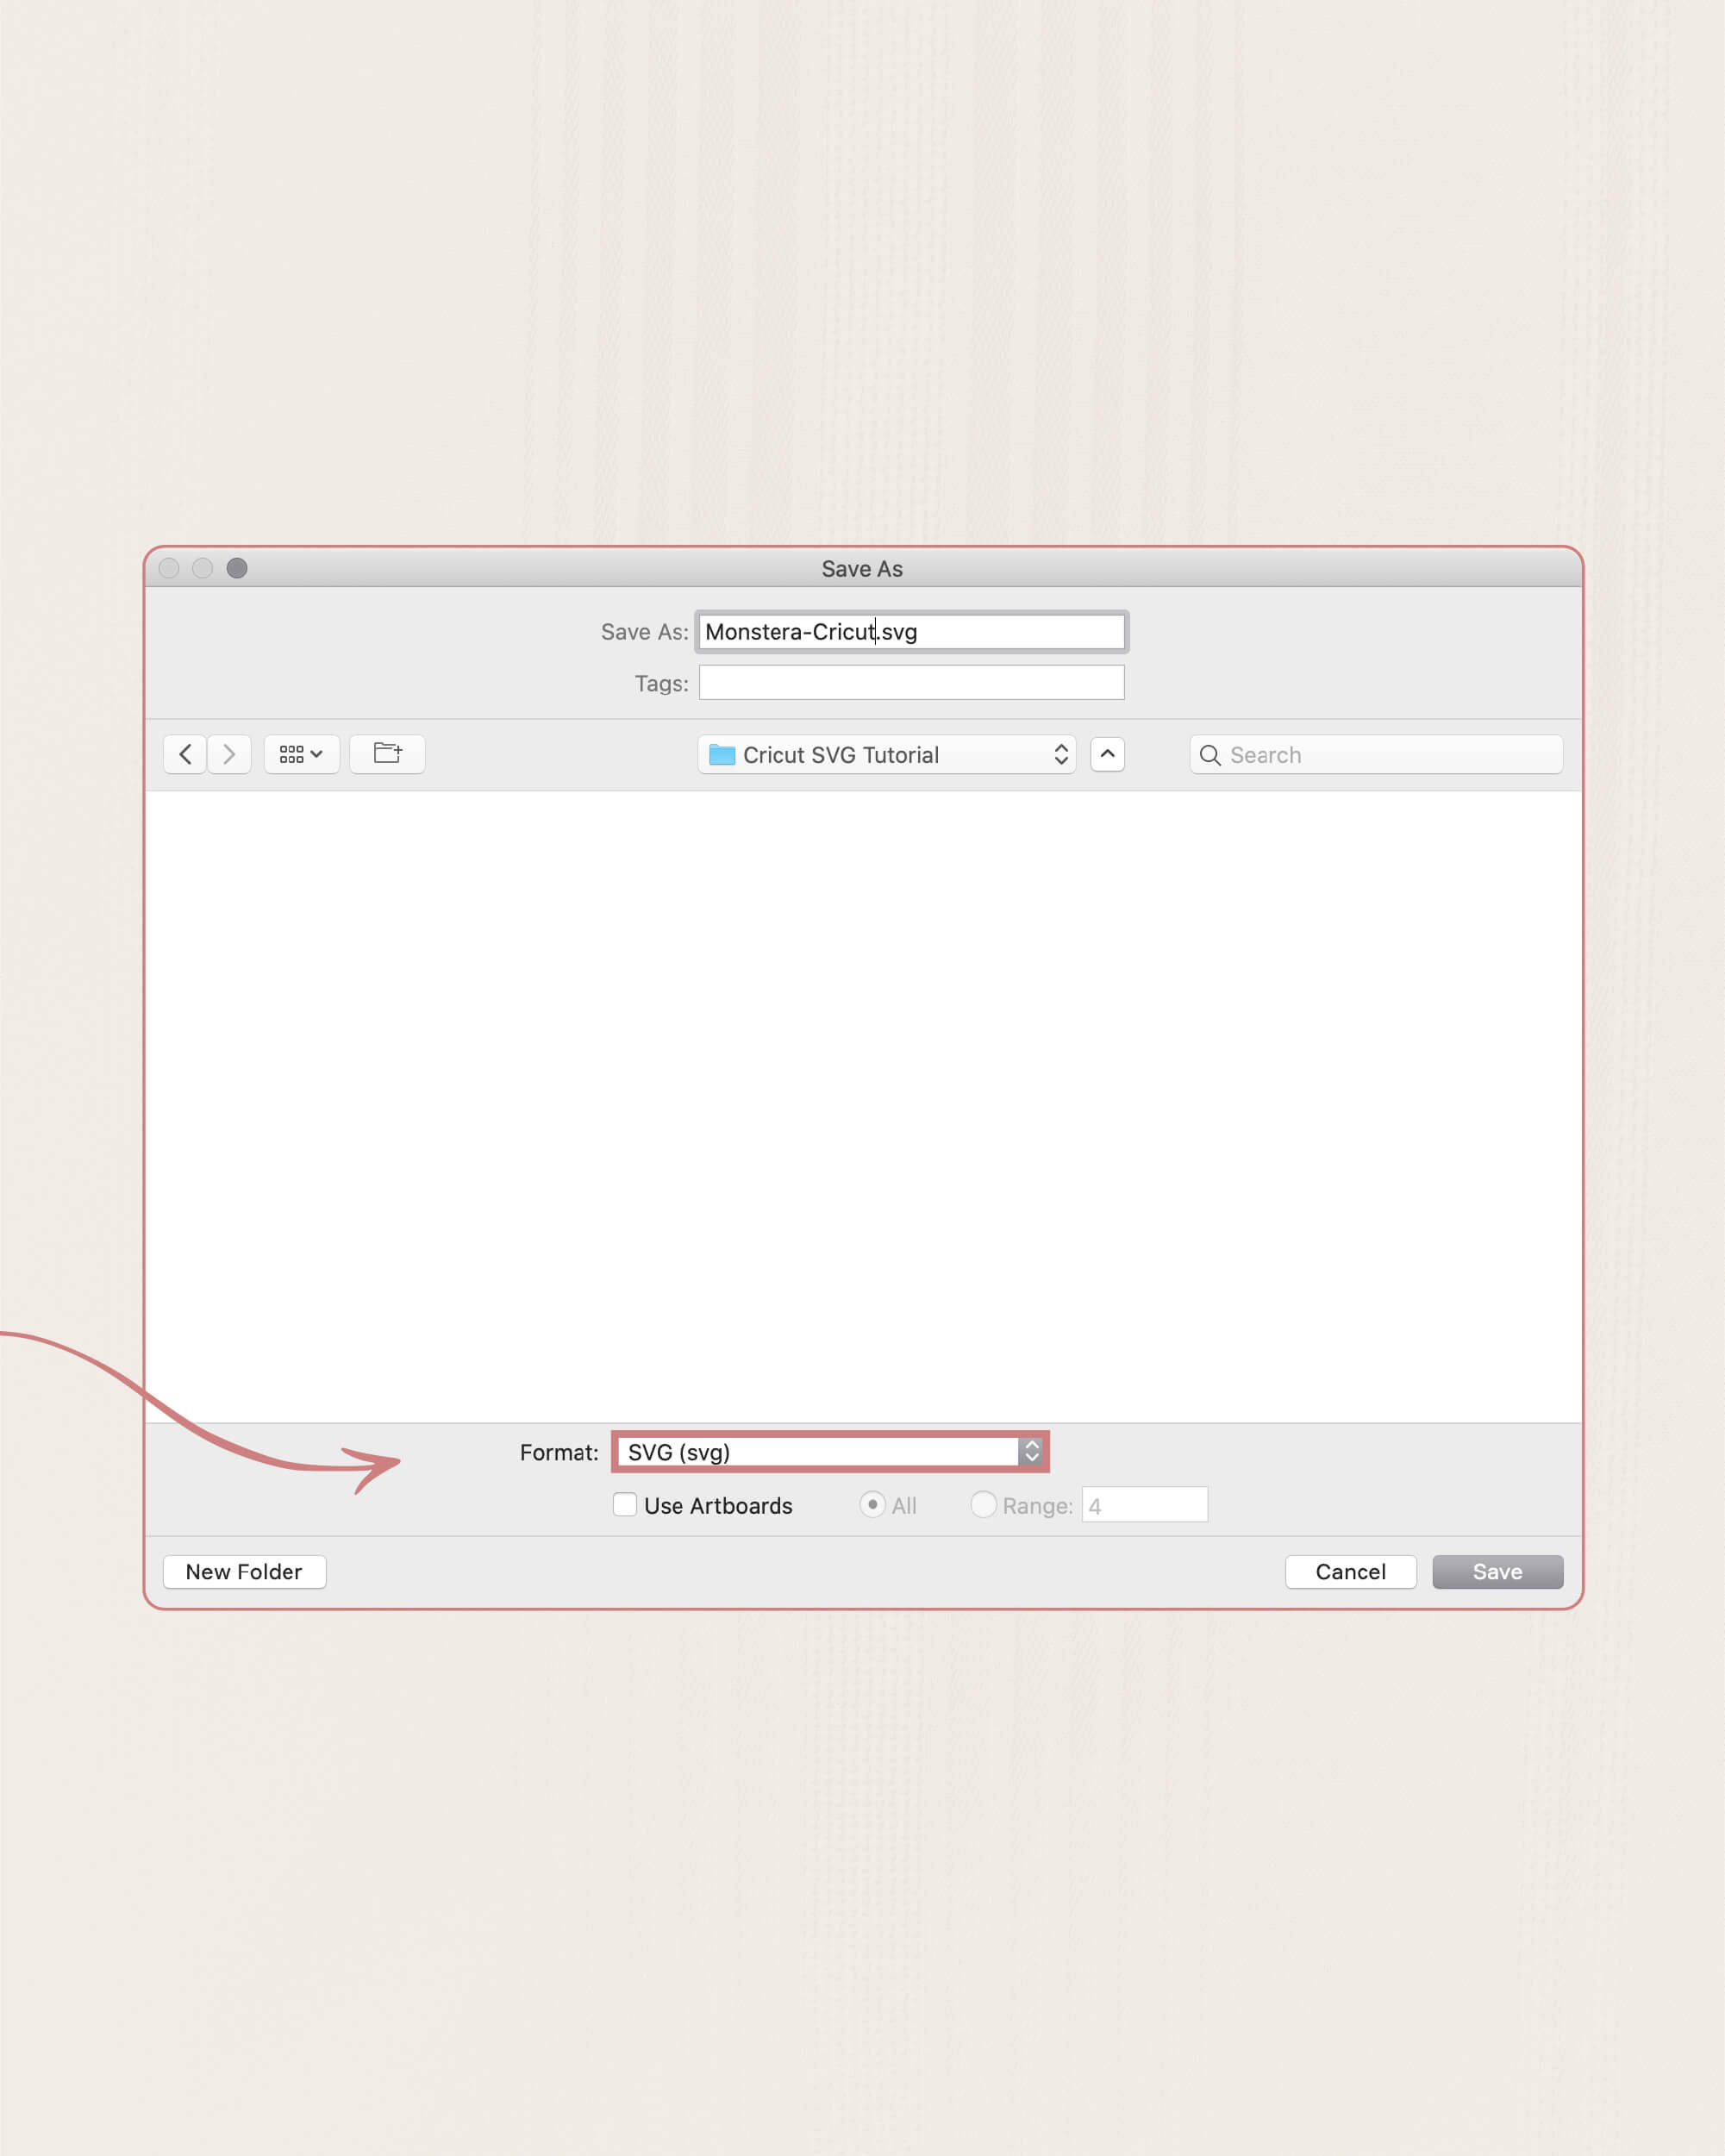
Exporting as an SVG File
To save the SVG, go to “File>Save As>” and in the format option select “SVG”.

Using Your SVG File in Cricut Design Space
In Cricut Design Space, select “New Project”. Within your new project canvas, navigate to the bottom left sidebar and select “Upload”. Then select “Upload Image” and drop your SVG file into Cricut Design Space. Save the new upload. Then select the image from the recently uploaded images, and select the green “Insert Images” button in the bottom right corner. You can then adjust the size and position on your canvas before cutting.

Examples of Projects with SVG Files for Cutting with Your Cricut
- This Printable Mothers Day Banner
- This Hand Painted Linen Tea Towel
- The Table Numbers and Moss Names at My Wedding Reception


