If you have ever tried making a craft with the traditional paper mache technique and enjoyed the process, making a modern circle vase with paper mache clay should be high on your to-craft list!
As you know, 2020 has been the year I’ve fallen in love with the process of paper mache – a perfect quarantine, quiet evening craft. I decided to explore and learn some other paper mache techniques.
When I saw the H&M circular ceramic vases on Reserve Home I was inspired to figure out a way to DIY a similar style of vase. I knew paper mache clay is the approach I would need to take for this vase, as traditional paper mache would be tedious working with this circular/tubular shape. Turns out I was right, paper mache clay worked beautifully for this modern home craft!
How to Make Paper Mache Clay:
There are many recipes online for creating paper mache clay. Some recipes are complex, requiring white glue, toilet paper, all-purpose drywall joint compound, and a heavy-duty food processer or attachment for your hand drill to blend the ingredients.
These recipes can be incredible for creating detailed paper sculptures, BUT, I looked at them and found both the learning curve and financial investment required intimidating.
The recipe below is the same recipe I use for a traditional paper mache technique, with the addition of salt (for preservation). It also requires no small appliances or tools, just your hands!
{{ This post contains affiliate links. These links don’t cost you anything extra, but allow me to run this site and provide free content for you. You can read the full disclosure here.}}

Easy Paper Mache Clay Recipe
Read the Gilded Stork guide to paper mache glue here.
- Newspaper
- Water
- Flour
- Table salt
*As an Amazon Associate I earn from qualifying purchases.

Instructions for Making Paper Mache Clay
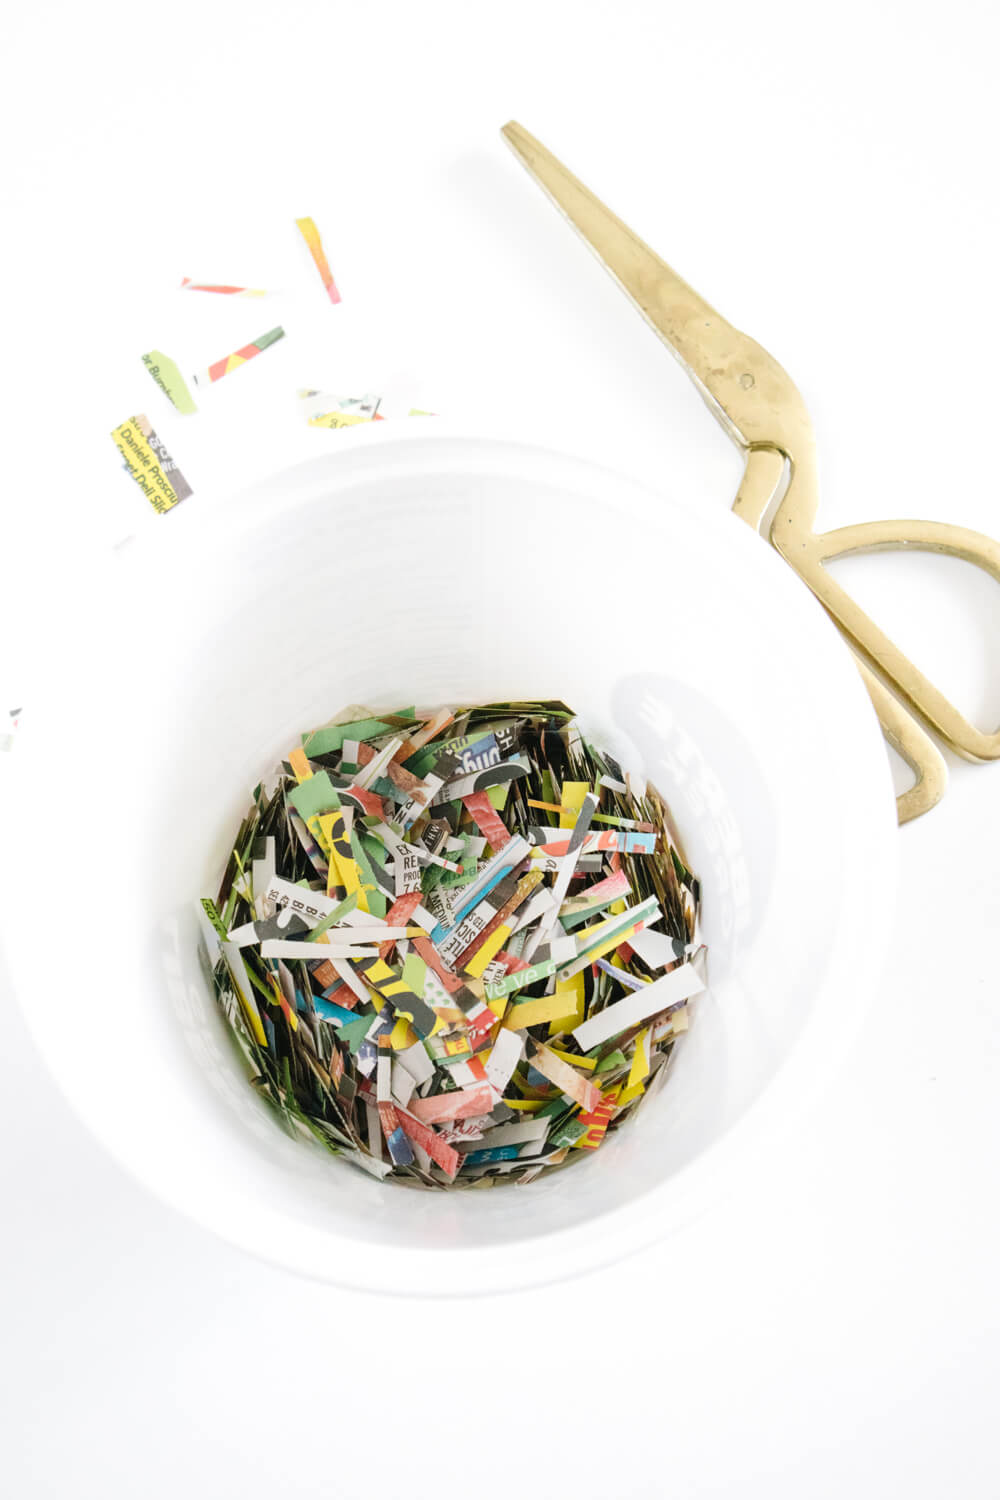
Begin by shredding or cutting your newspapers into small pieces. This vase takes about 1 cup of shredded paper.
Cover the paper in water and let it sit overnight to fully absorb as much water as possible.
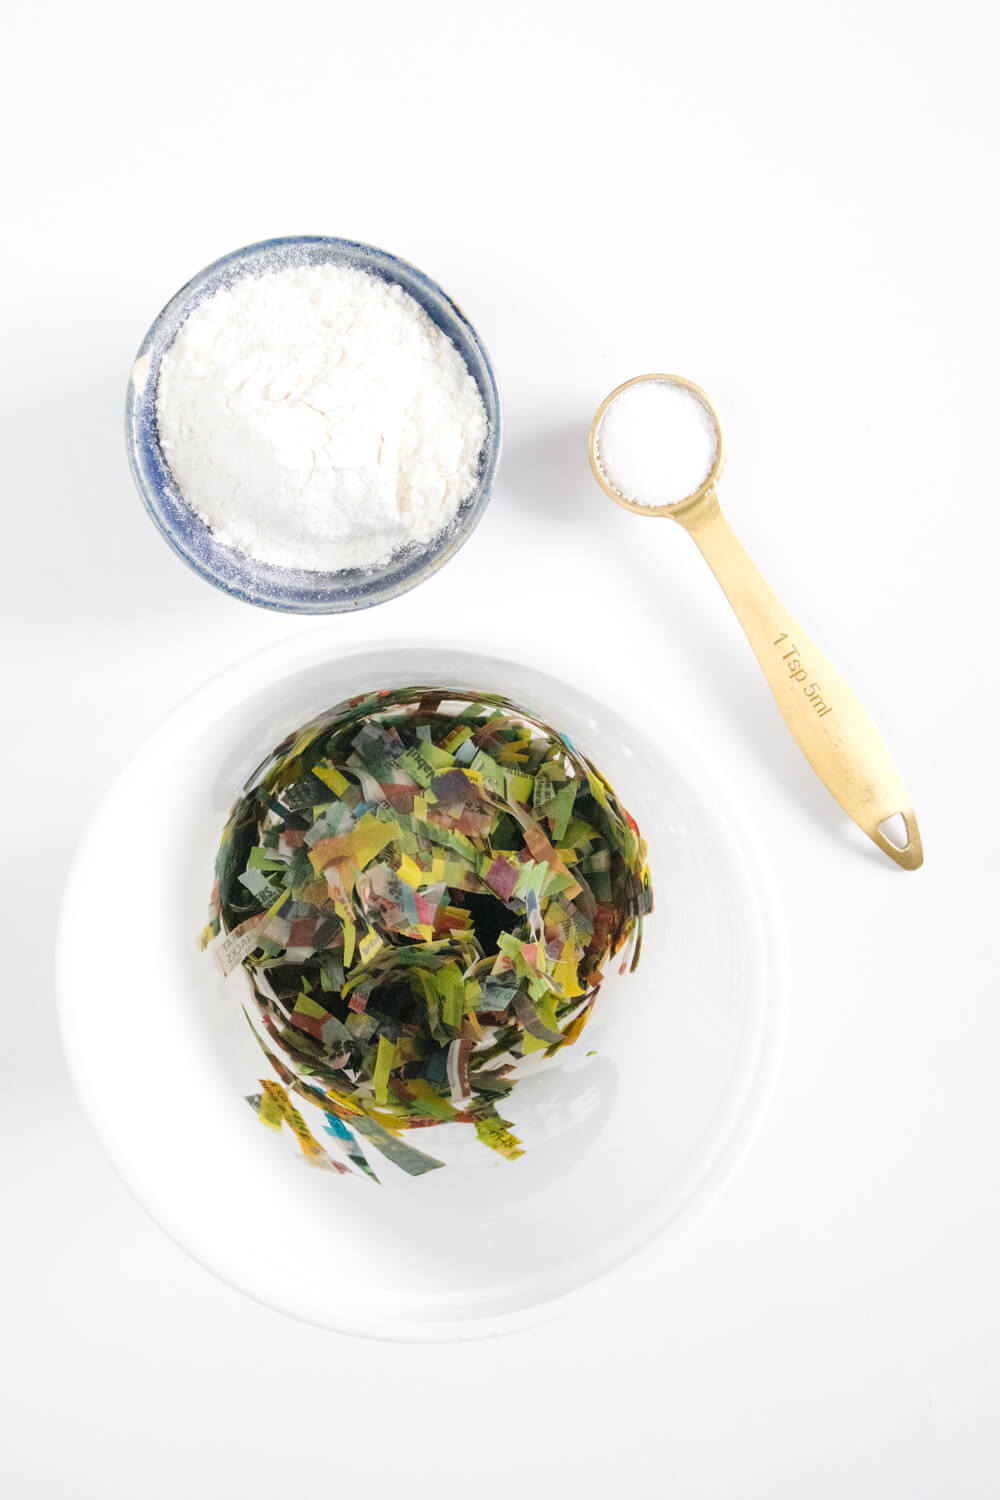
Next, drain the paper of the water. Add 1/8 cup flour and 1 tsp salt to the paper. Using your hands, mix well until you have a consistency that can be spread.
How to Make a Modern Circle Vase With a Paper Mache Balloon Structure
Supplies you will need:
- Two long balloons (the kind used for animal making)
- Balloon pump
- Tape
- Two cups
- Bread knife
- Craft knife
- Paper mache clay

Instructions for Making a Modern Circle Vase with a Paper Mache Balloon Structure
To create the structure for the vase, pump two skinny balloons (the kind that is used for making animals). Tie the ends of the balloons to make two circles. Aim to have the two balloons close in size.
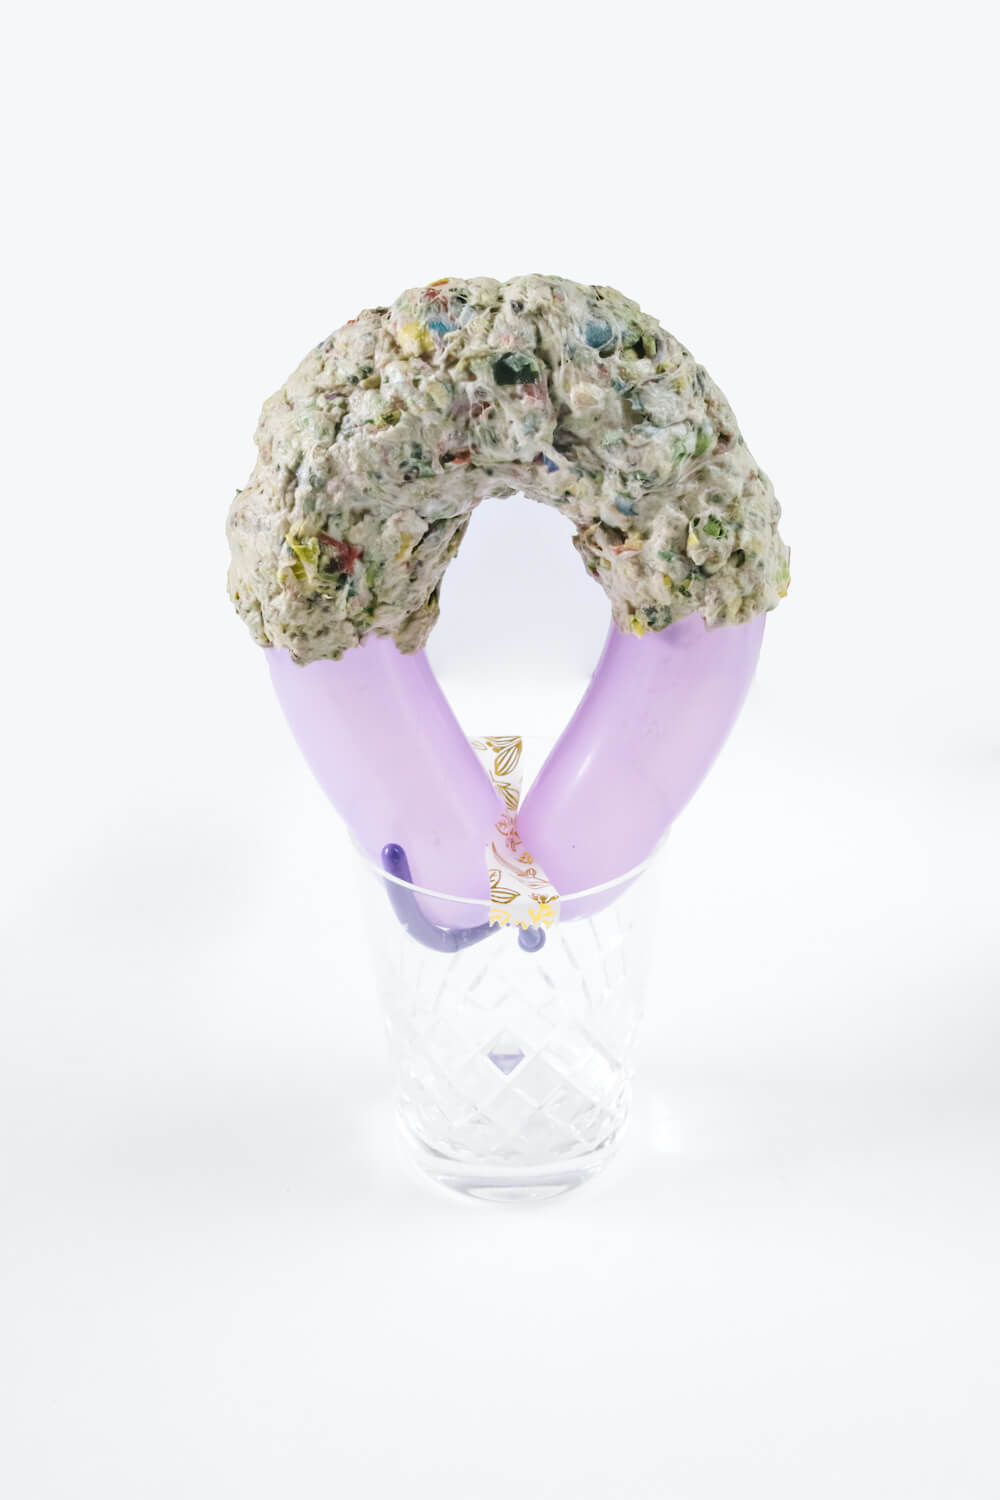
Place the tied end of a balloon into a cup (use weighted cups so that it supports the weight of the wet paper mache clay) and use a piece of tape to secure the balloon’s position.
Using another cup, do this with the second balloon as well.
Evenly spread the paper mache clay around each balloon, creating two, half-circles (think elbow macaroni shapes!).
Allow the paper mache clay to dry, about 24 hours.

Once the clay has dried, pop the balloons to remove them, creating two hollow structures.
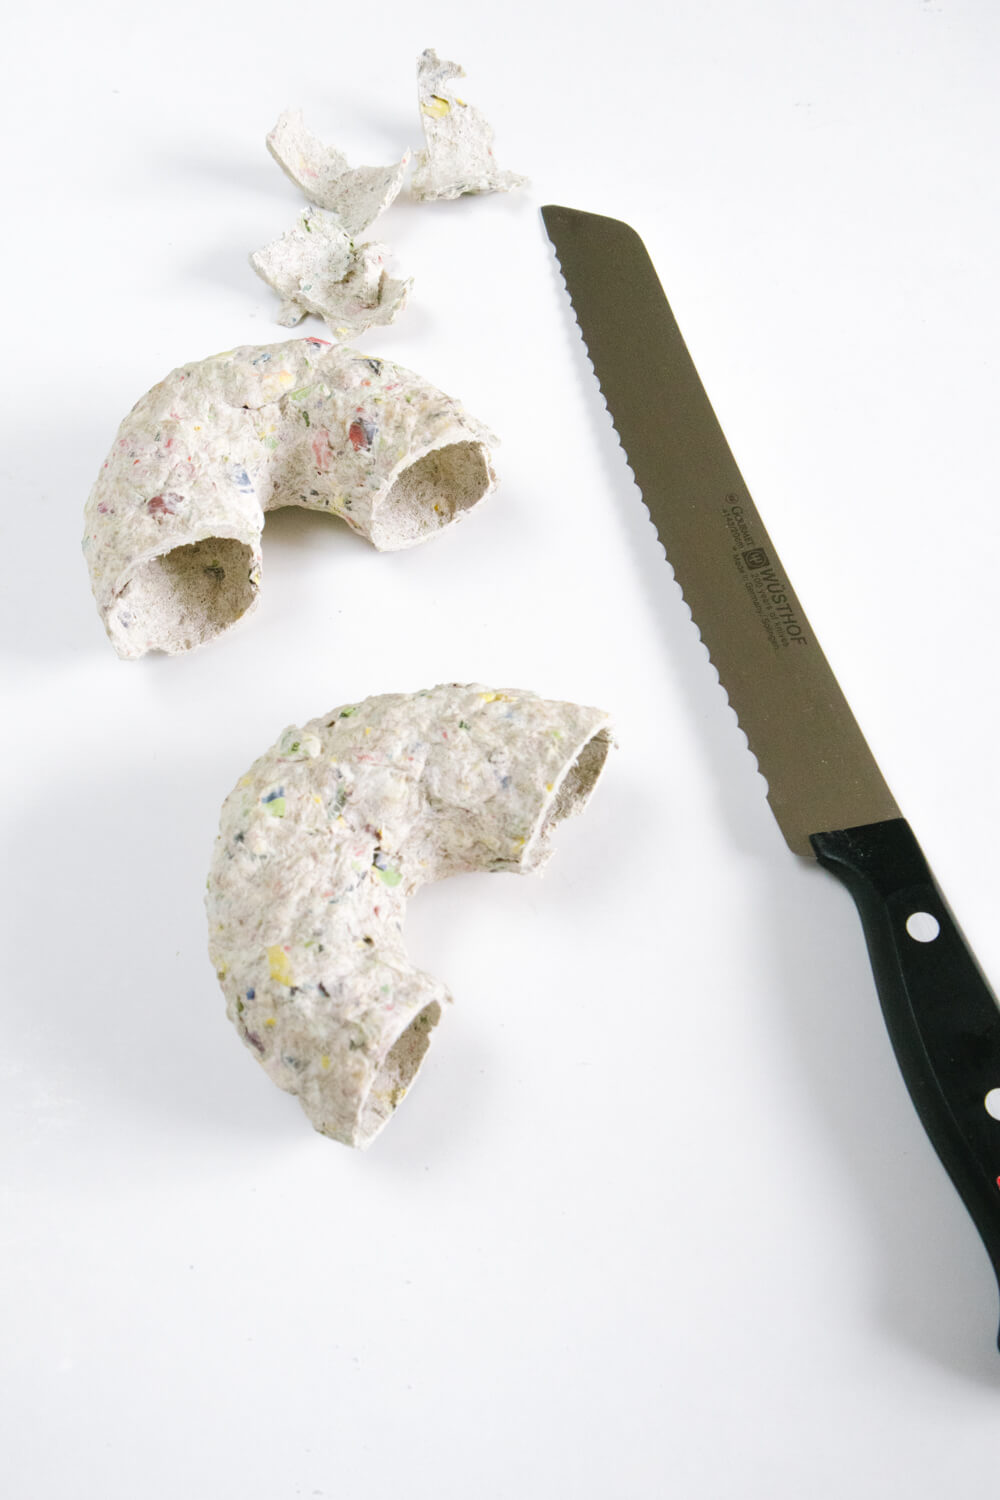
Use a bread knife to “saw” a clean edge to both half-circles. Cut them down until, when stacked, they create a complete circle or donut shape.
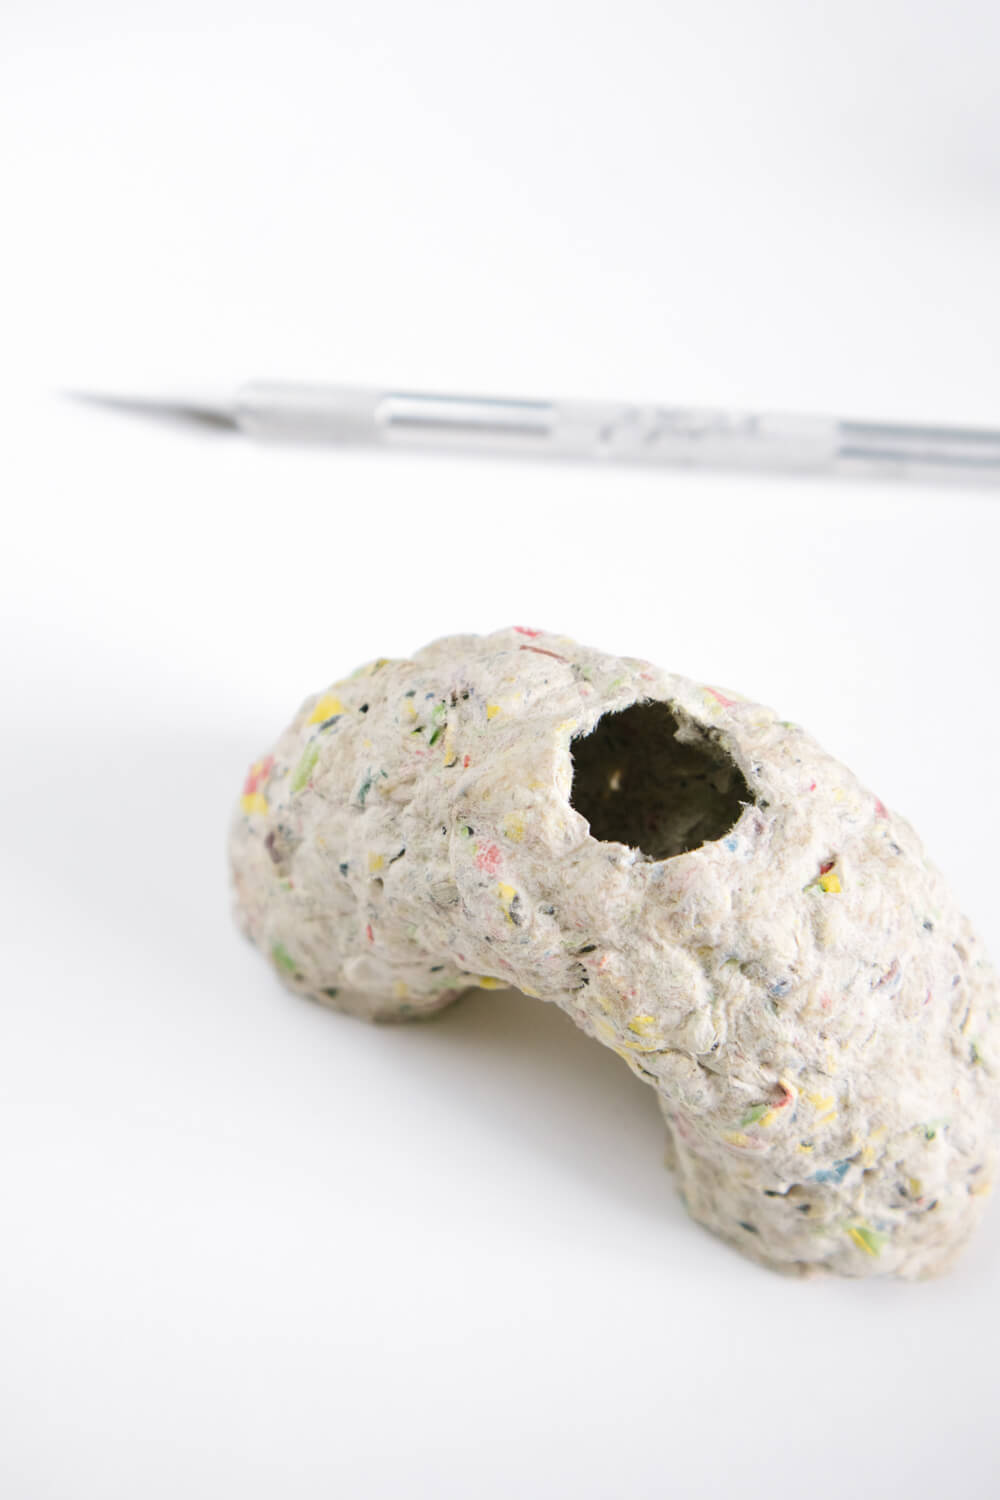
On the top middle of one of the half circles, use a craft knife to cut a small circular opening, this will be the mouth of the vase.

On the top of the second half-circle, use the bread knife to cut a flat opening, this will allow the vase to stand.


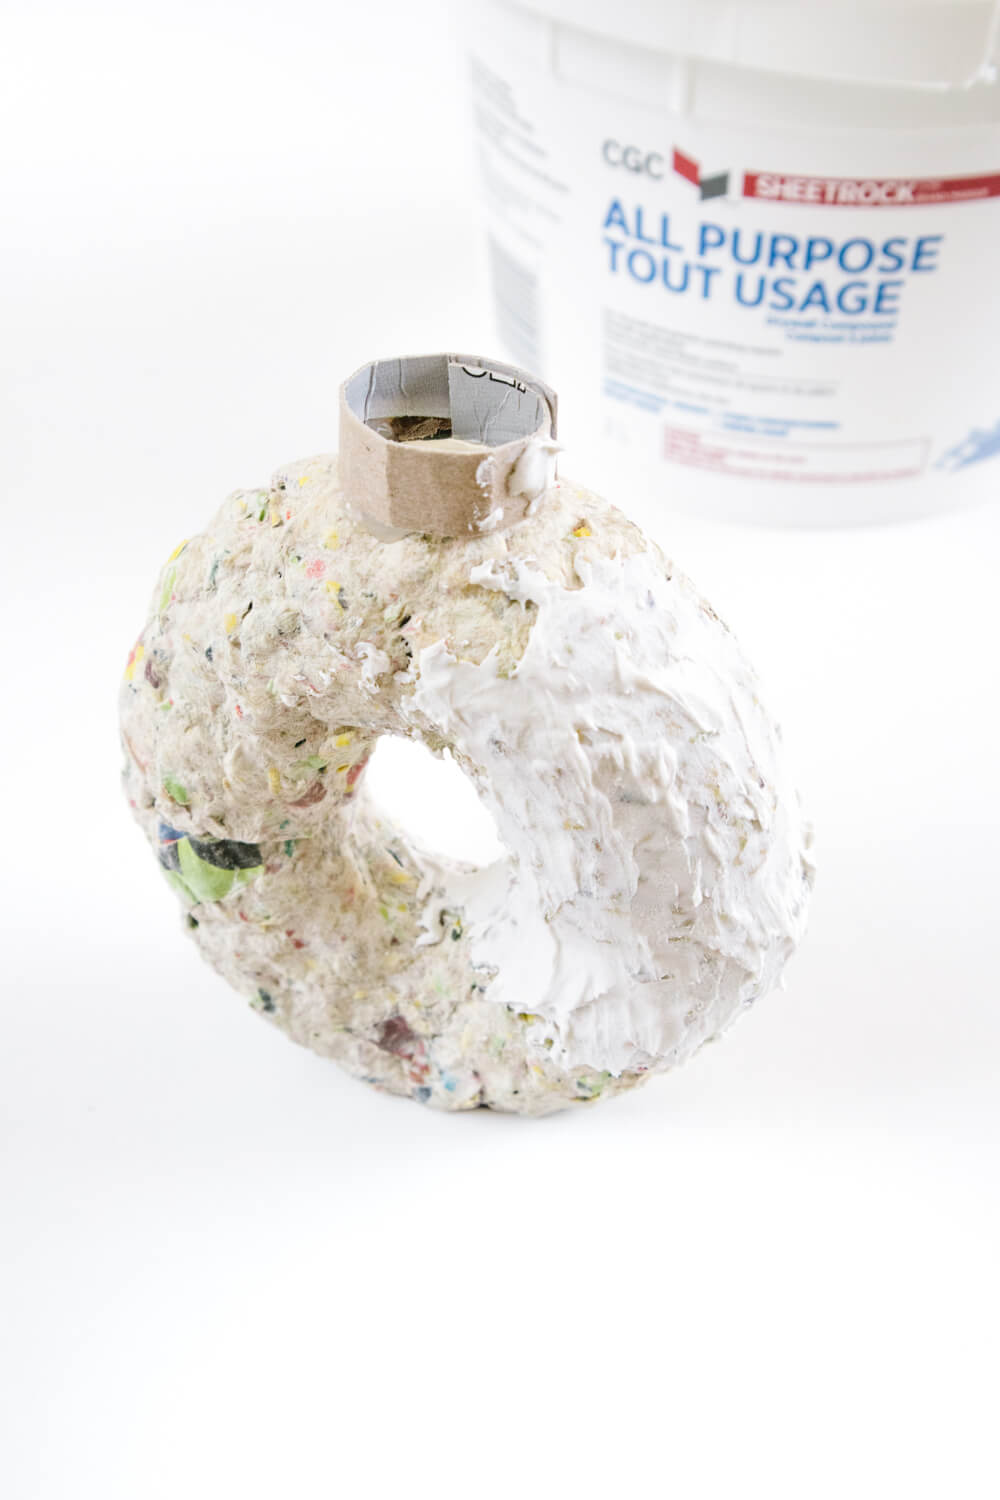
With a glue gun, secure the piece cut from the cereal box to the bottom, creating the vase’s base. Glue also the lip around the vase’s mouth, and the two paper mache half-circles together. You now have the circle vase structure fully in place!

Working with All-Purpose Drywall Compound
All-purpose drywall compound (also called all-purpose joint compound) is an affordable material that can be found at your local home building store. As made known from its name, joint compound is used between sheets of drywall and then sanded down to create a smooth wall surface.
As mentioned above in the paper mache clay recipe, some paper mache recipes use all-purpose drywall compound as an ingredient, this paper mache clay vase tutorial does not. However, after learning about it being used as a craft material, I was fascinated and researched what else it could be used for! Turns out it works well for being used as a plaster!
Pros for crafting with all-purpose drywall compound: very spreadable, affordable to layer and use lots of, super easy to sand smooth or to texture, easy to purchase (get it at any of your local home building stores!).
Cons for crafting with all-purpose drywall compound: sanding is dusty, need to seal with paint or think mod podge, etc. in order to keep from chipping/denting
Because I wanted the vase to have a ceramic-like, surface, I knew all-purpose drywall compound would be perfect for creating a smooth surface.

Applying All-Purpose Drywall Compound to Your Paper Mache Clay Vase
Spread your all-purpose drywall compound all over the vase. This can be done with a palette knife or paintbrush. Be generous with the plaster to fill the crevises created from the paper mache clay texture.
Allow to dry for a couple of hours and then give it a rough sanding. Use a brush to apply a second coat of the drywall joint compound and then sand again. This can be done as many times as needed until you have enough surface built to sand smooth. I did this twice with the vase seen in this post.

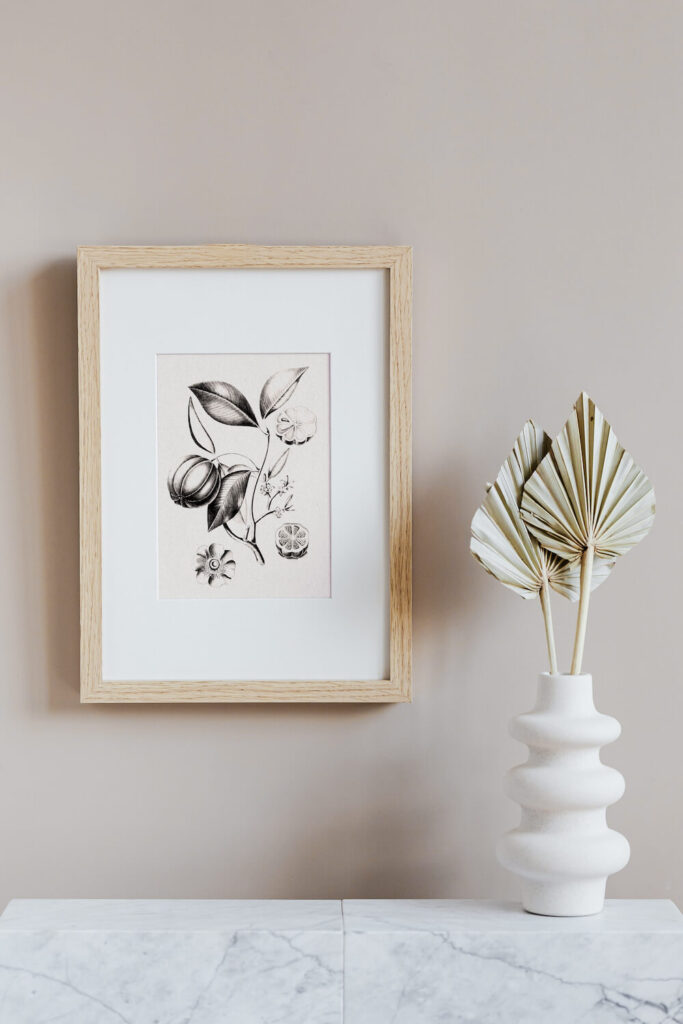
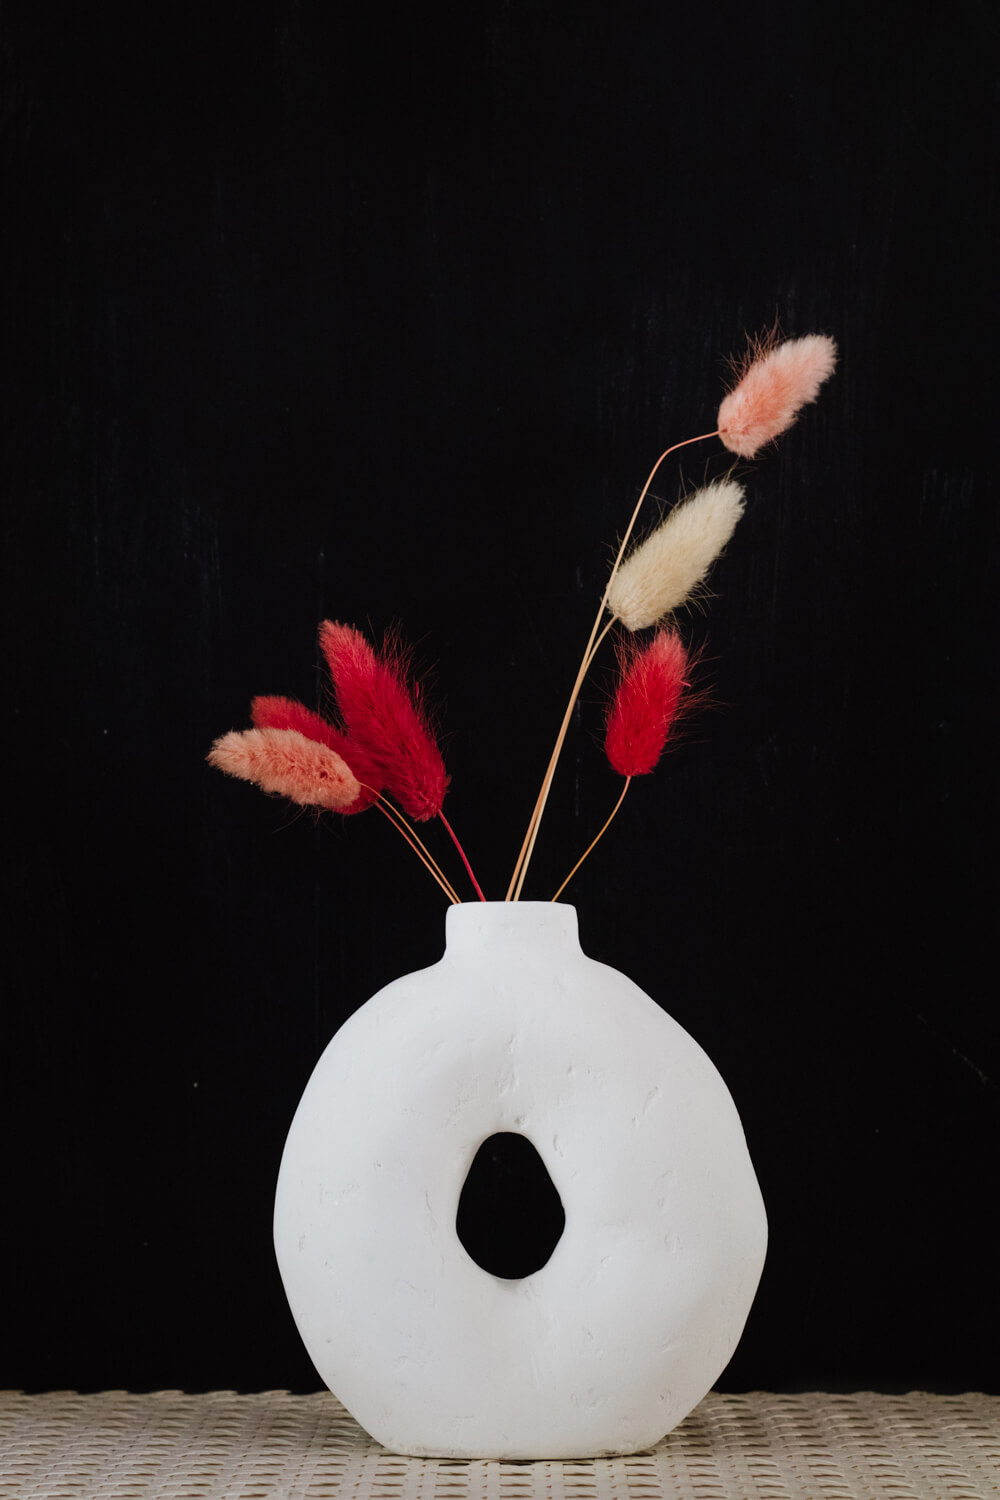
Because this vase is made from paper it is not suitable for water and fresh flowers, but perfect for dried and faux flowers! I’ve used a few dried rabbit tail flowers. These DIY Dried Raffia Palm Fronds or these Paper Palm Fronds would also be perfect complementary crafts!

OTHER POSTS YOU MIGHT LIKE