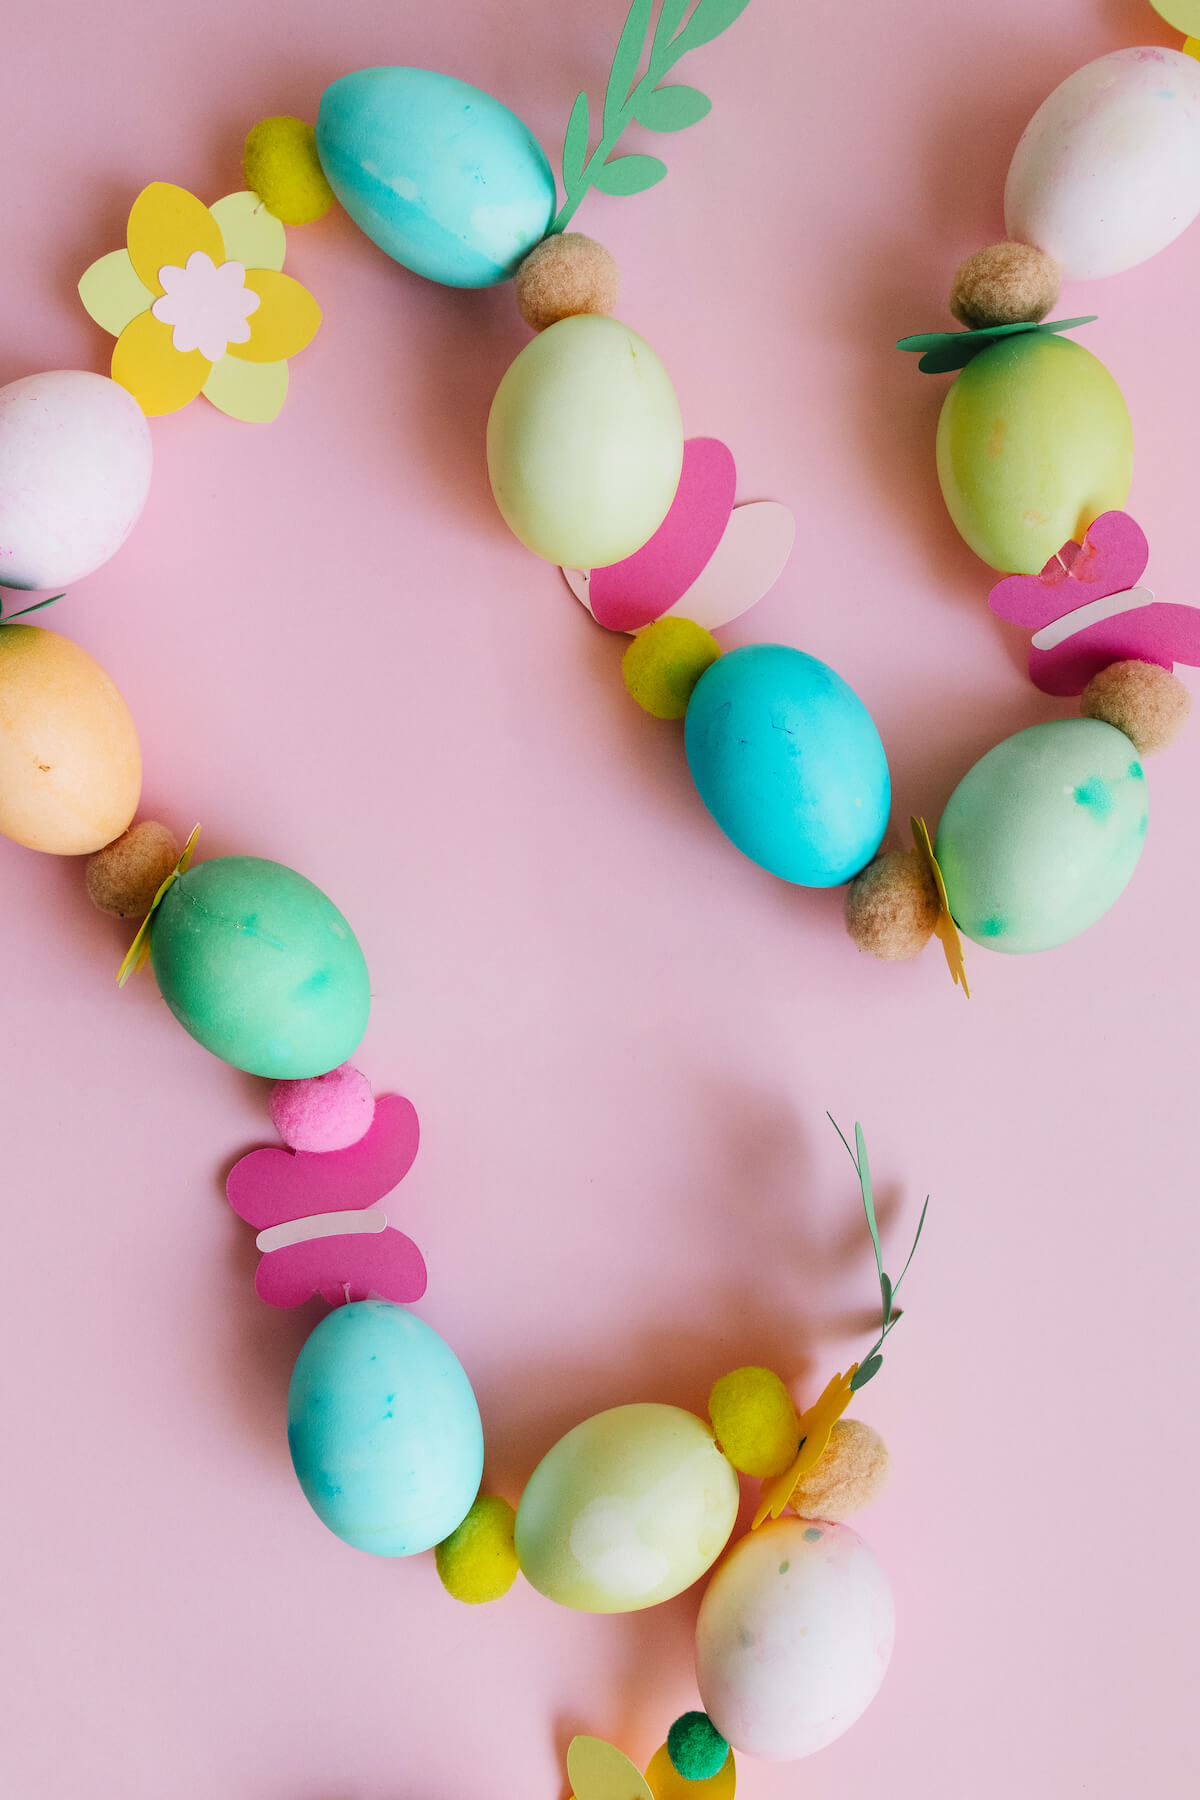
Craft a cheerful spring egg garland with help from your Cricut!
This DIY Cricut Spring Egg Garland is such a fun project that’s simple and easy enough to enjoy crafting with your kids or grandkids.
With a creative mix of egg dyeing and spring cardstock floral cutouts made using your Cricut machine, it’s a mixed media project you’ll be proud to display!
What You’ll Need for Your DIY Spring Egg Garland
Here’s everything we used for this kid-friendly spring project:
- Raw eggs (we used six)
- Sharp needle + small hammer
- Bowl (to collect the eggs for cooking)
- Warm water for rinsing
- Egg dye kit
- Cricut machine (or scissors + templates)
- Colored cardstock
- Glue stick
- Pompoms in bright colors
- Floss, ribbon, or fishing line
- Scissors
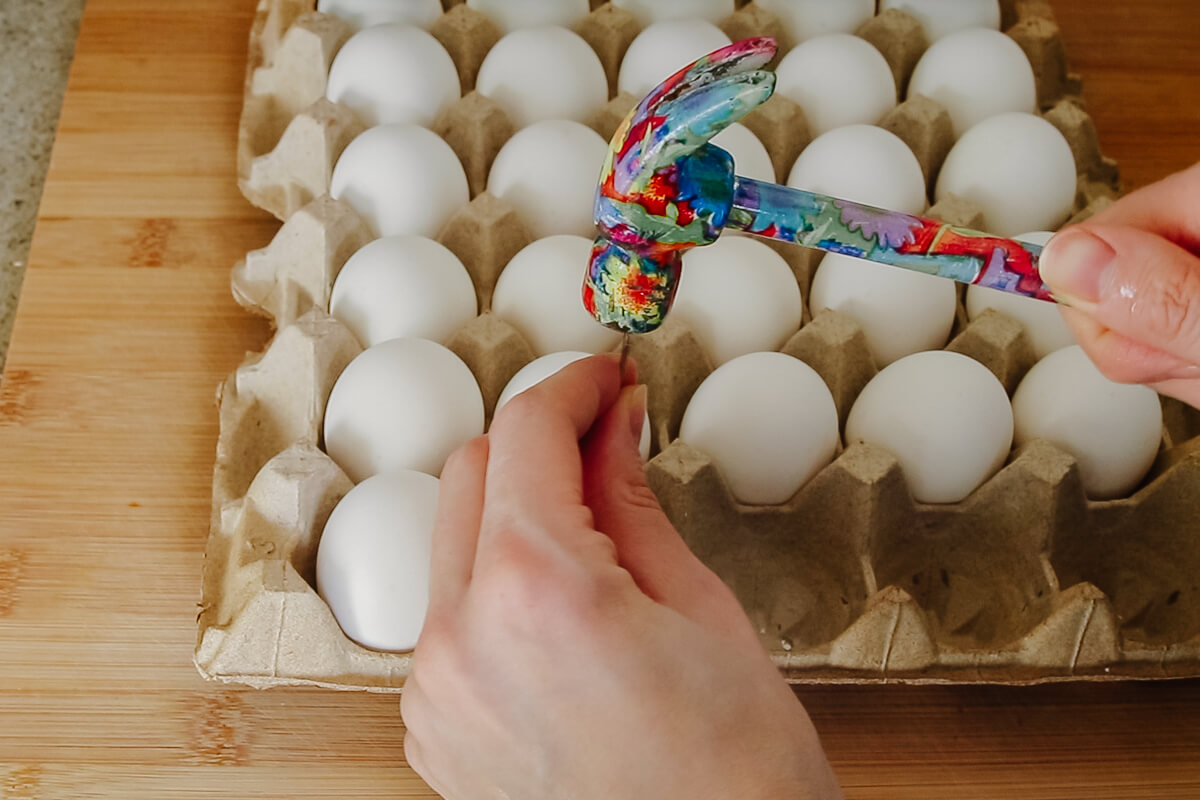
Step 1: Prepping the Eggs
To empty the eggs, I gently tapped a small hole into each end using a sharp needle and a tiny hammer.
Once the initial hole was made, I used the needle to slightly widen the opening by carefully breaking the shell around it. This makes it easier to remove the inside of the egg.
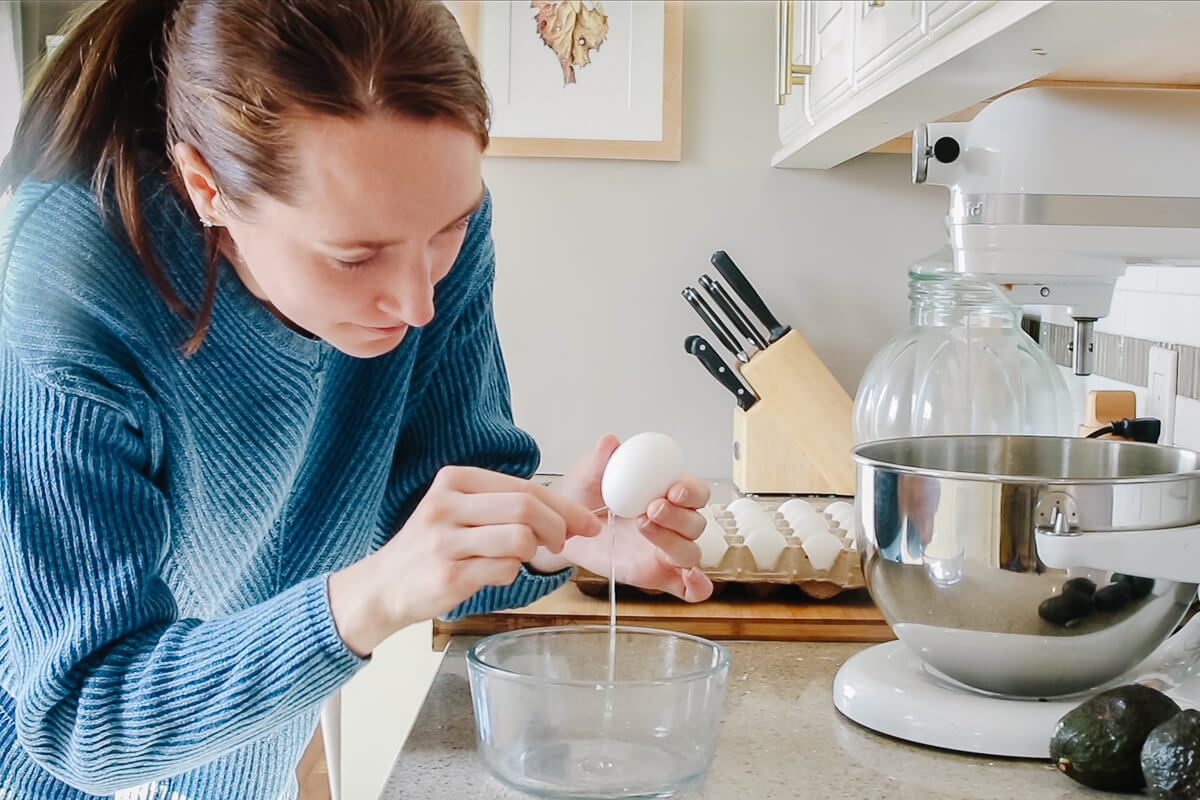
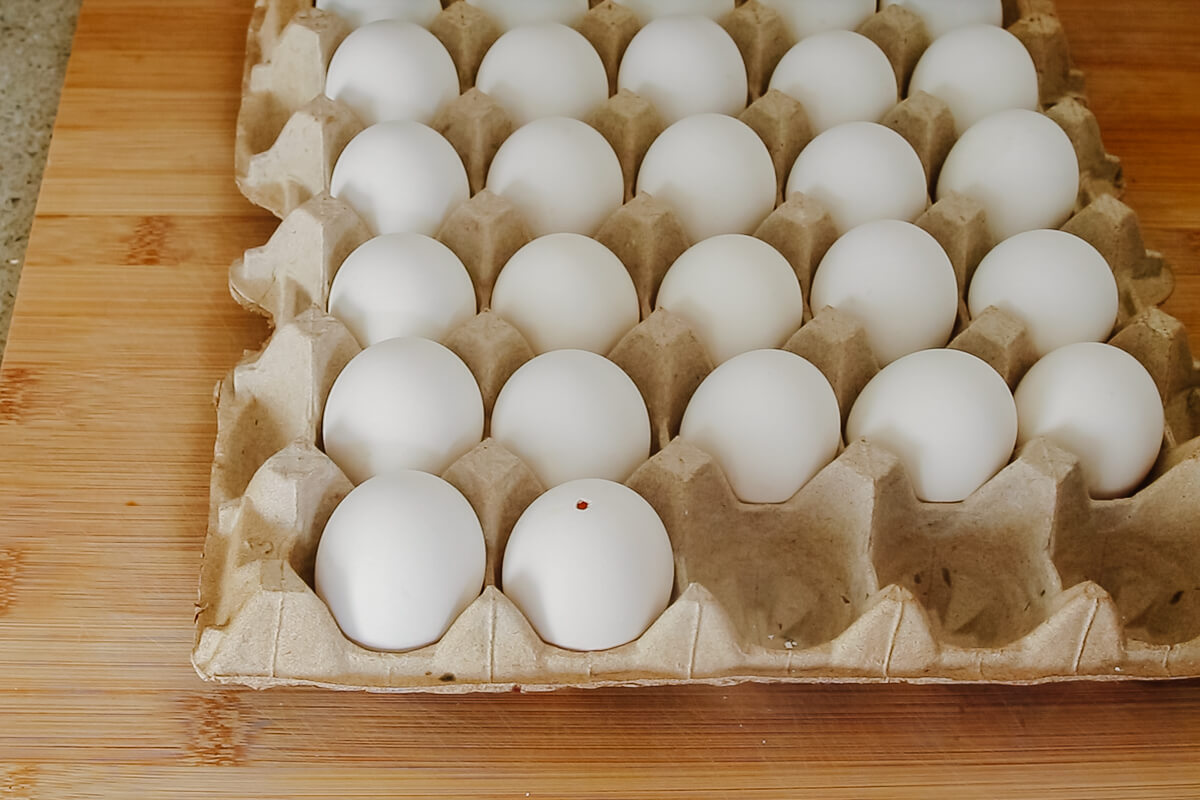
With holes on both ends, insert the needle inside to break the yolk. Then, blow through one end of the egg so the contents come out through the other. To clean the eggshells, run warm water through them and allow them to dry thoroughly.
(And yes, we had a delicious lunch of scrambled eggs after crafting!)

Step 2: Dyeing the Eggs Together
Next, follow the instructions on your egg dyeing kit to prepare the dyes. Just a tip: the recommended dye measurements often produce very deep colors. If you prefer soft pastel shades, simply dilute the dye mixture with more water.
Have fun with this part—try dipping the eggs into more than one color to experiment with blends and gradients. It’s a great chance to explore color theory in a hands-on way! My three-year-old and I really enjoyed this creative step together.

Be sure the eggs are fully dry before stringing them into a garland.
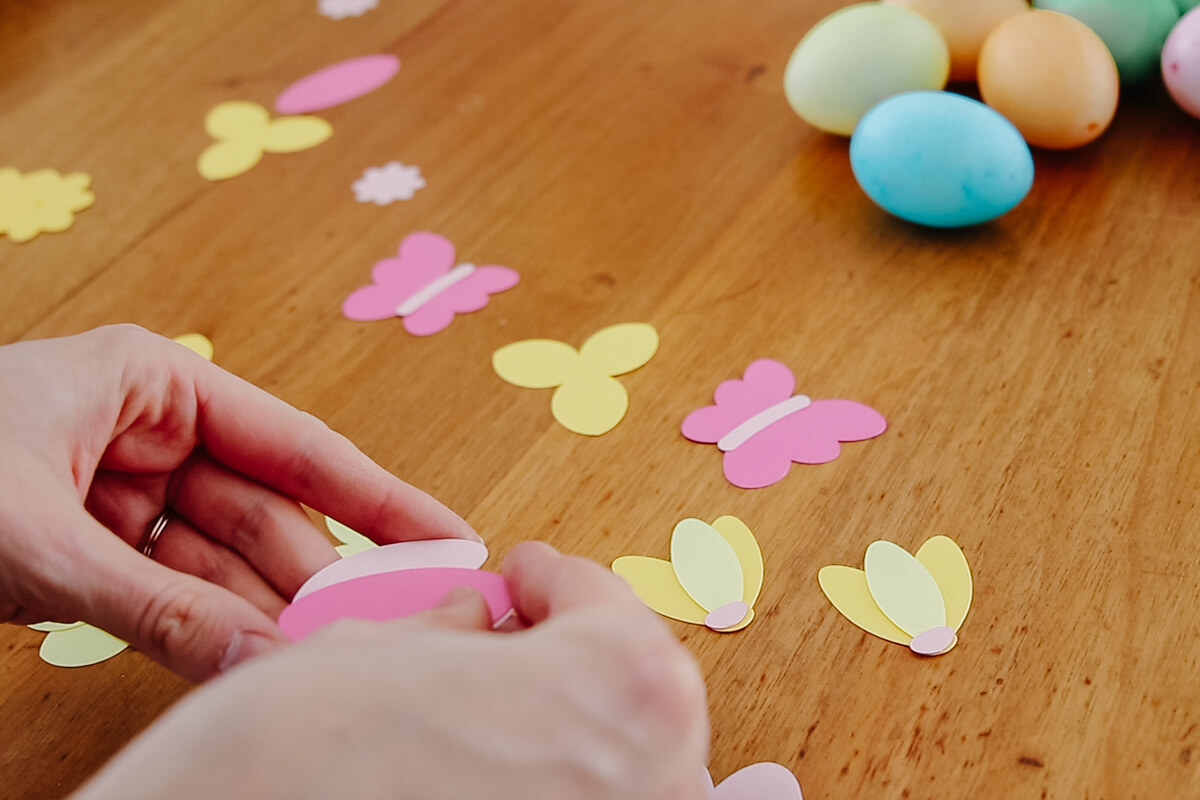
Step 3: Crafting Paper Flowers with Our Cricut
While we waited for the eggs to dry, I used my Cricut to cut out spring flower shapes. You can find these flower designs in the Gilded Stork design file library here or on Cricut Design Space here (they’re free with a Cricut Access subscription).
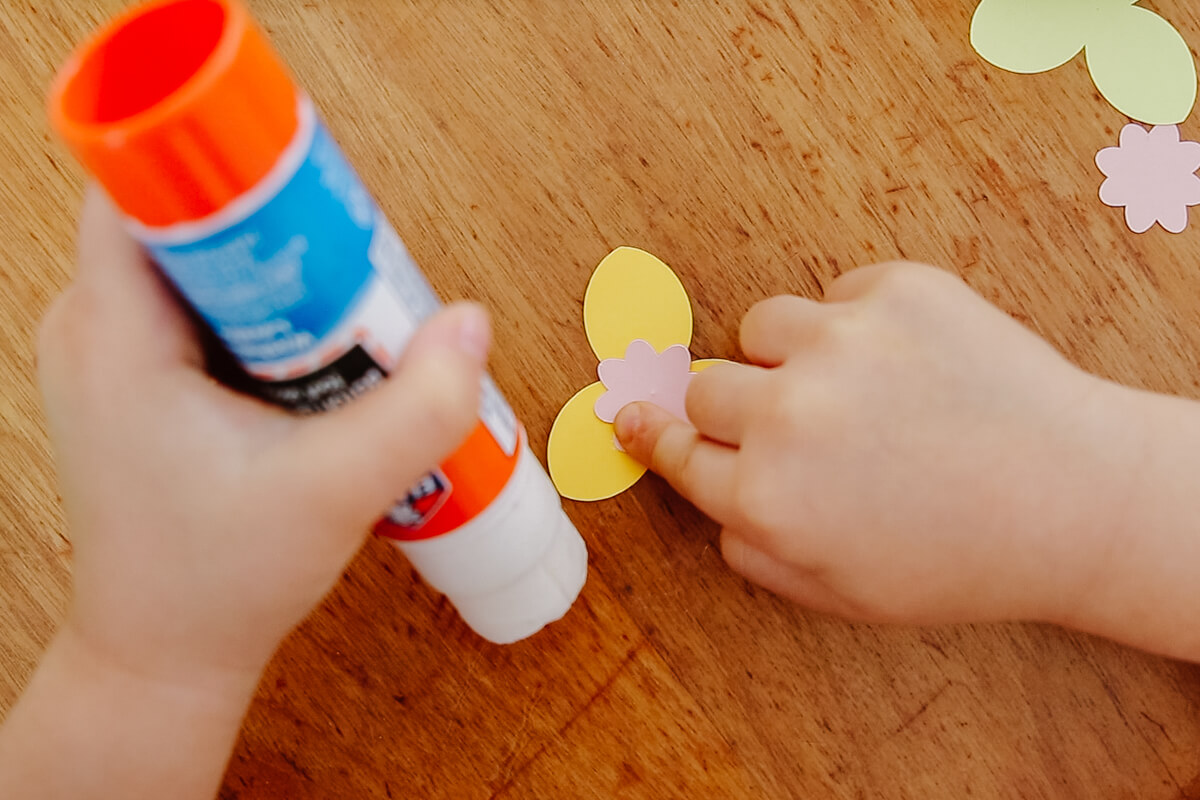
Next, I laid out all the pieces and invited my daughter to glue the flowers together. She loved it!
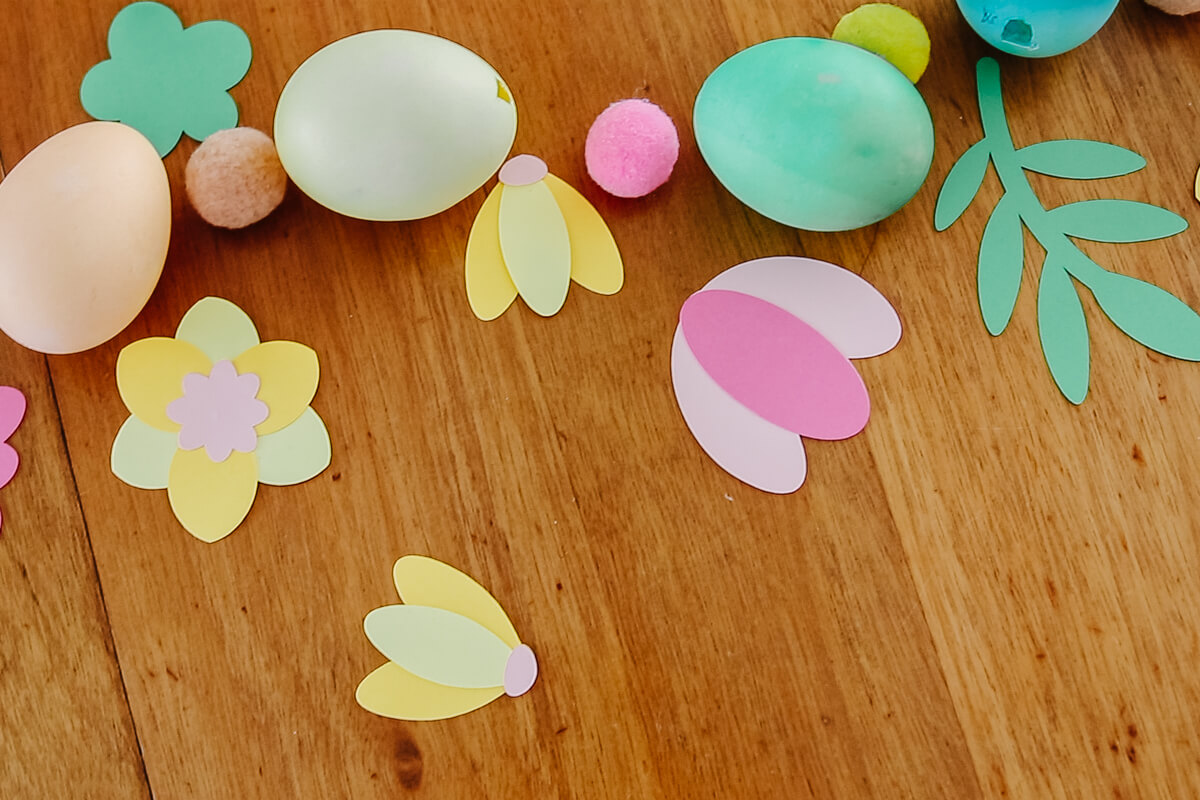
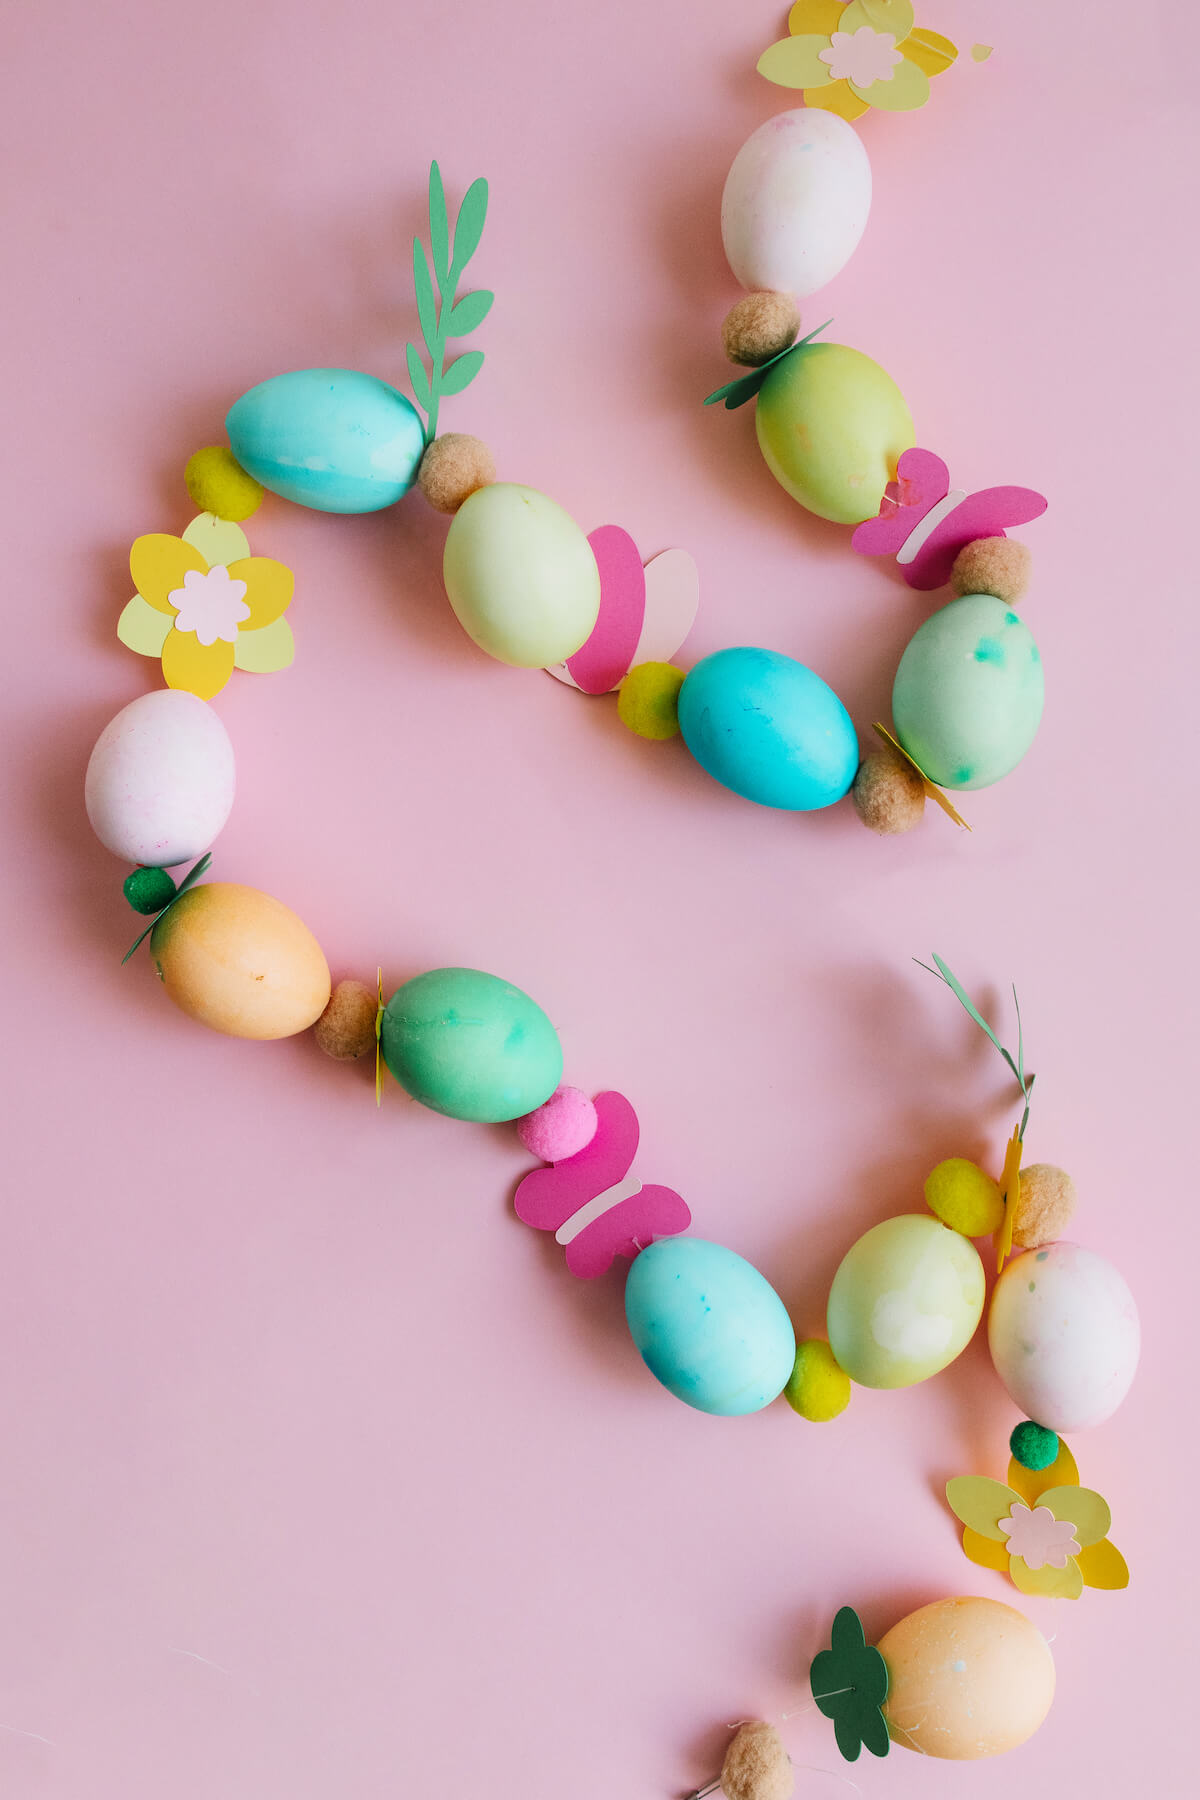
Step 4: Arranging Our Garland Design
Before stringing everything, we arranged the eggs and flowers in a line to preview the design. We alternated between different colored eggs and flowers for a playful and balanced look. We also decided to include colorful pompoms for a pop of texture, color, and shape.
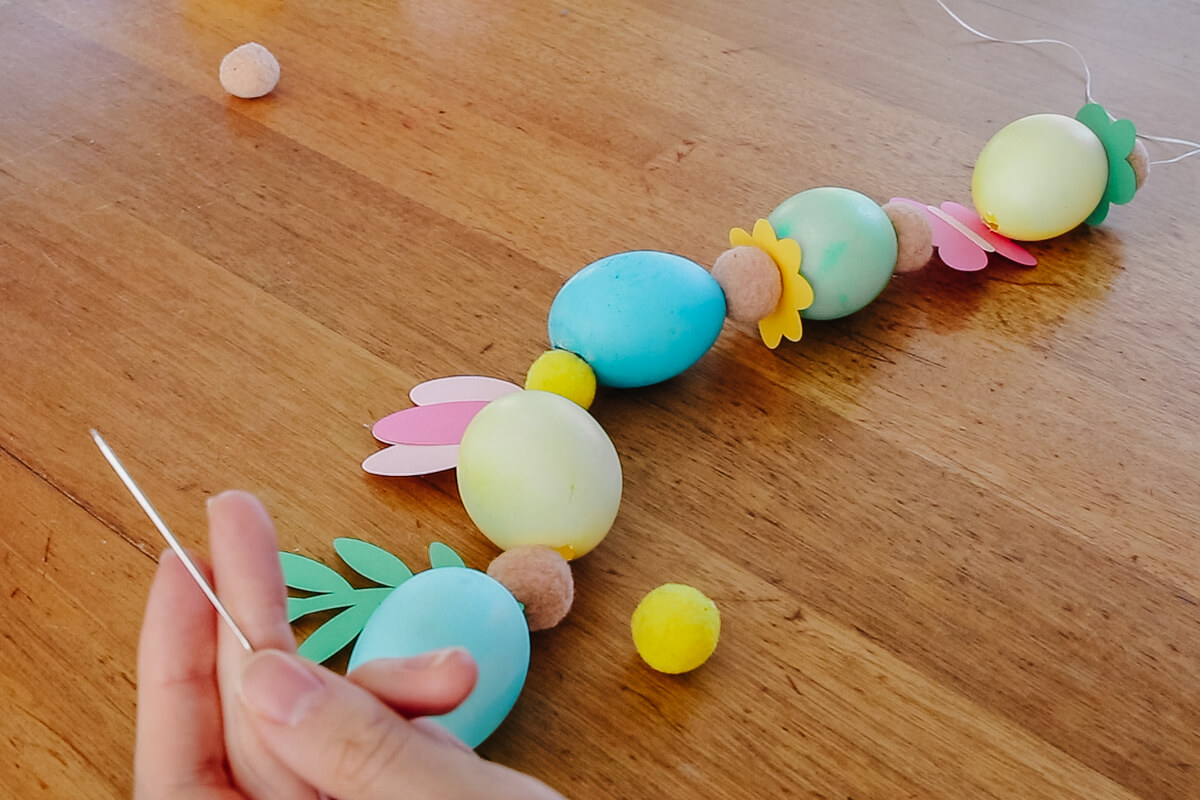
Step 5: Stringing the Garland
Finally, we strung all the pieces onto a long piece of floss. You can also use ribbon, fishing line, yarn—whatever you have on hand.
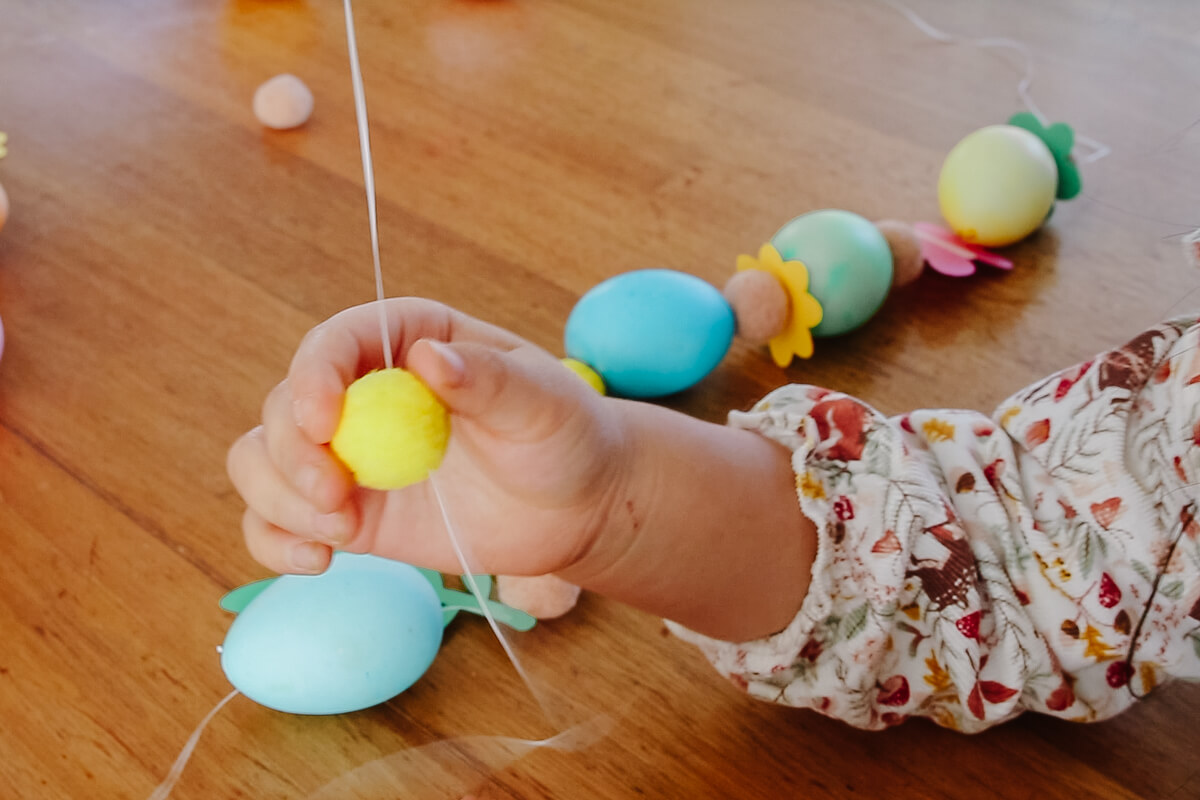
My daughter had so much fun stringing the pompoms. We added a pompom at each end and tied a knot to keep everything in place.
Step 7: Hanging It Up
This was such a fun project to do with my daughter—I think it might just become a new yearly tradition! The garland is now hanging in our living room, and feels like a ray of sunshine during this long winter we’ve been experiencing.


