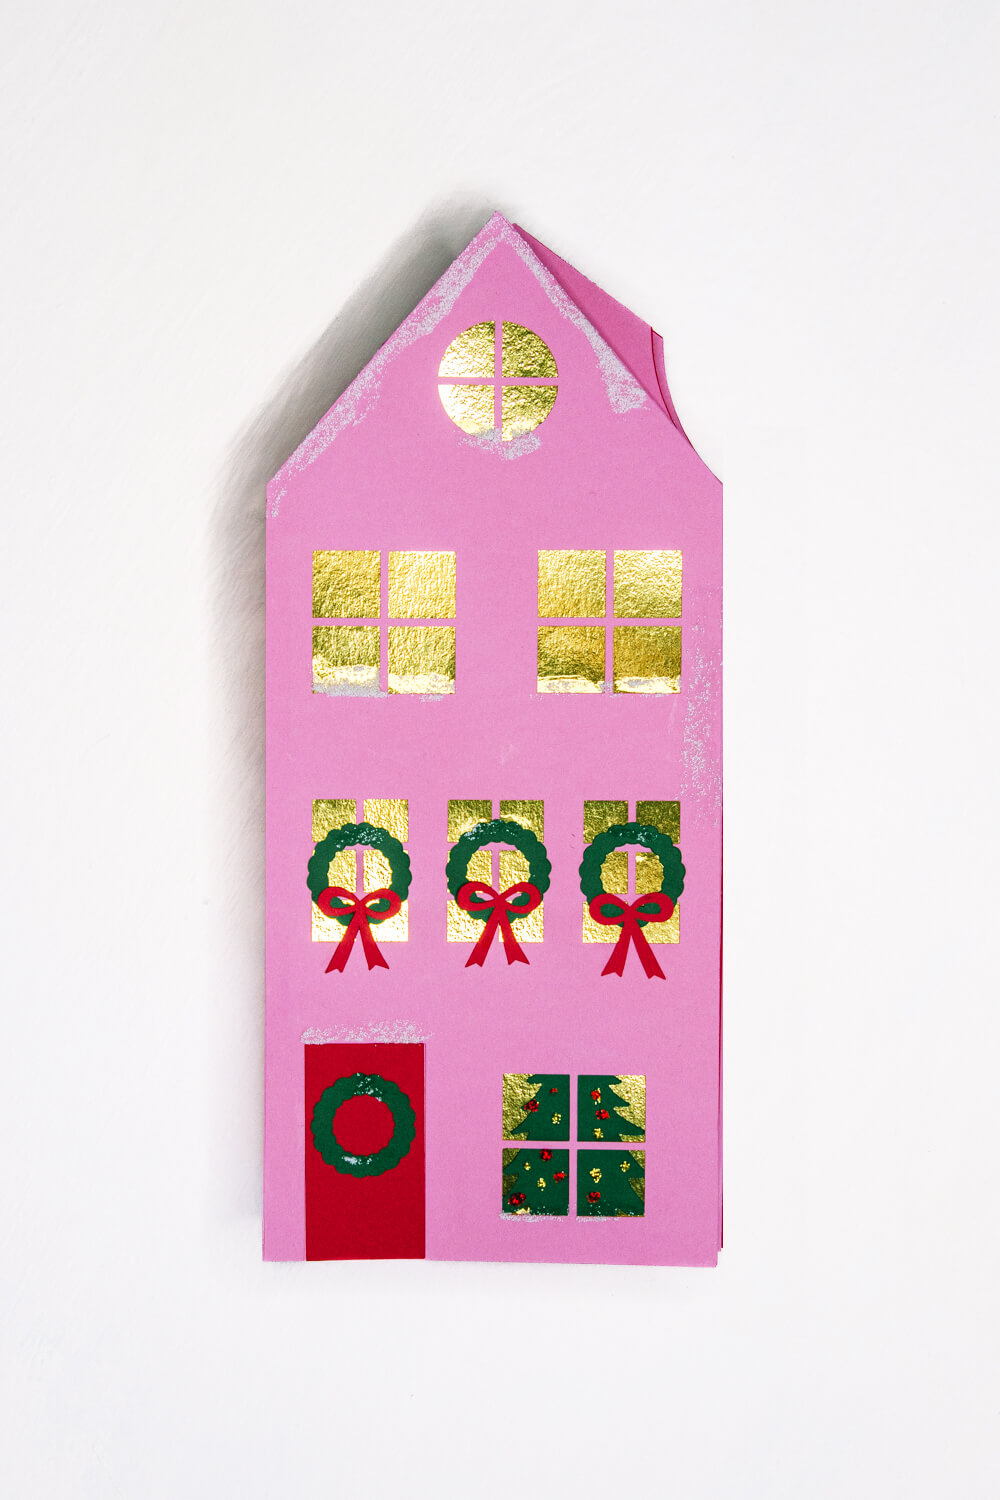
If you’ve been following Gilded Stork for a while, you probably know how much I love a Christmas village! From the advent calendar I made to a Cricut pen-drawn Christmas village I created for a Cricut Summit, there’s just something so charming about a little row of townhouses and other buildings all decorated for Christmas.
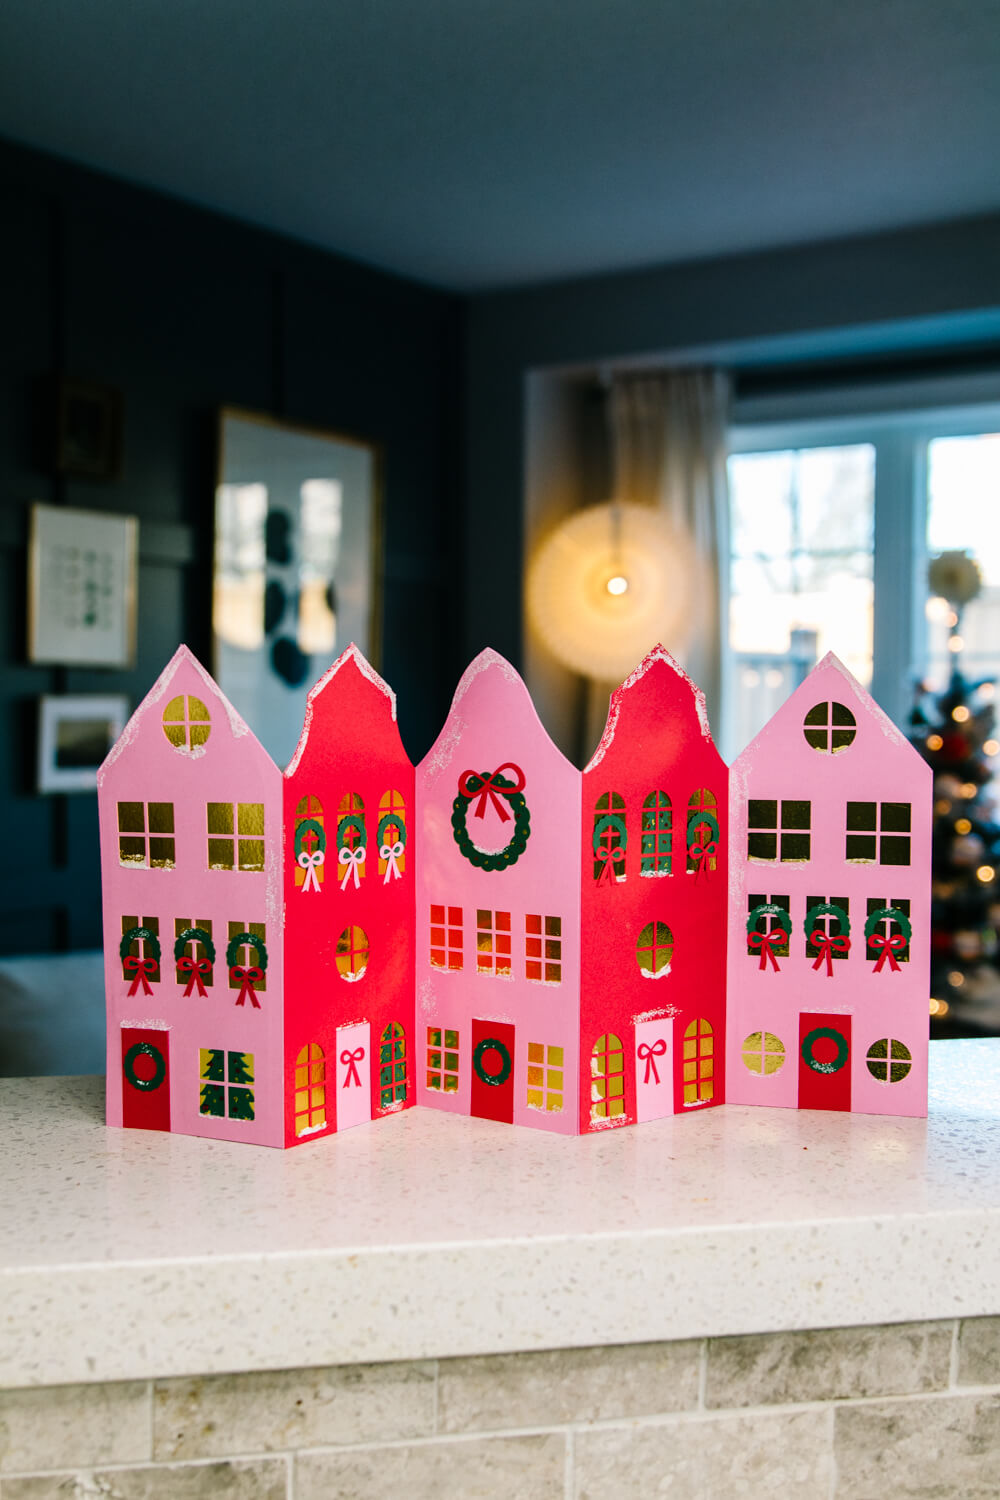
The one challenge that can come with creating a Christmas village is the complexity. I wanted to design something that was relatively simple to make, but still had plenty of intricate details. I think I was able to achieve just that with this design! Using only four shades of cardstock, you can create a beautiful little Christmas village with glowing windows, Christmas trees, and plenty of festive details.
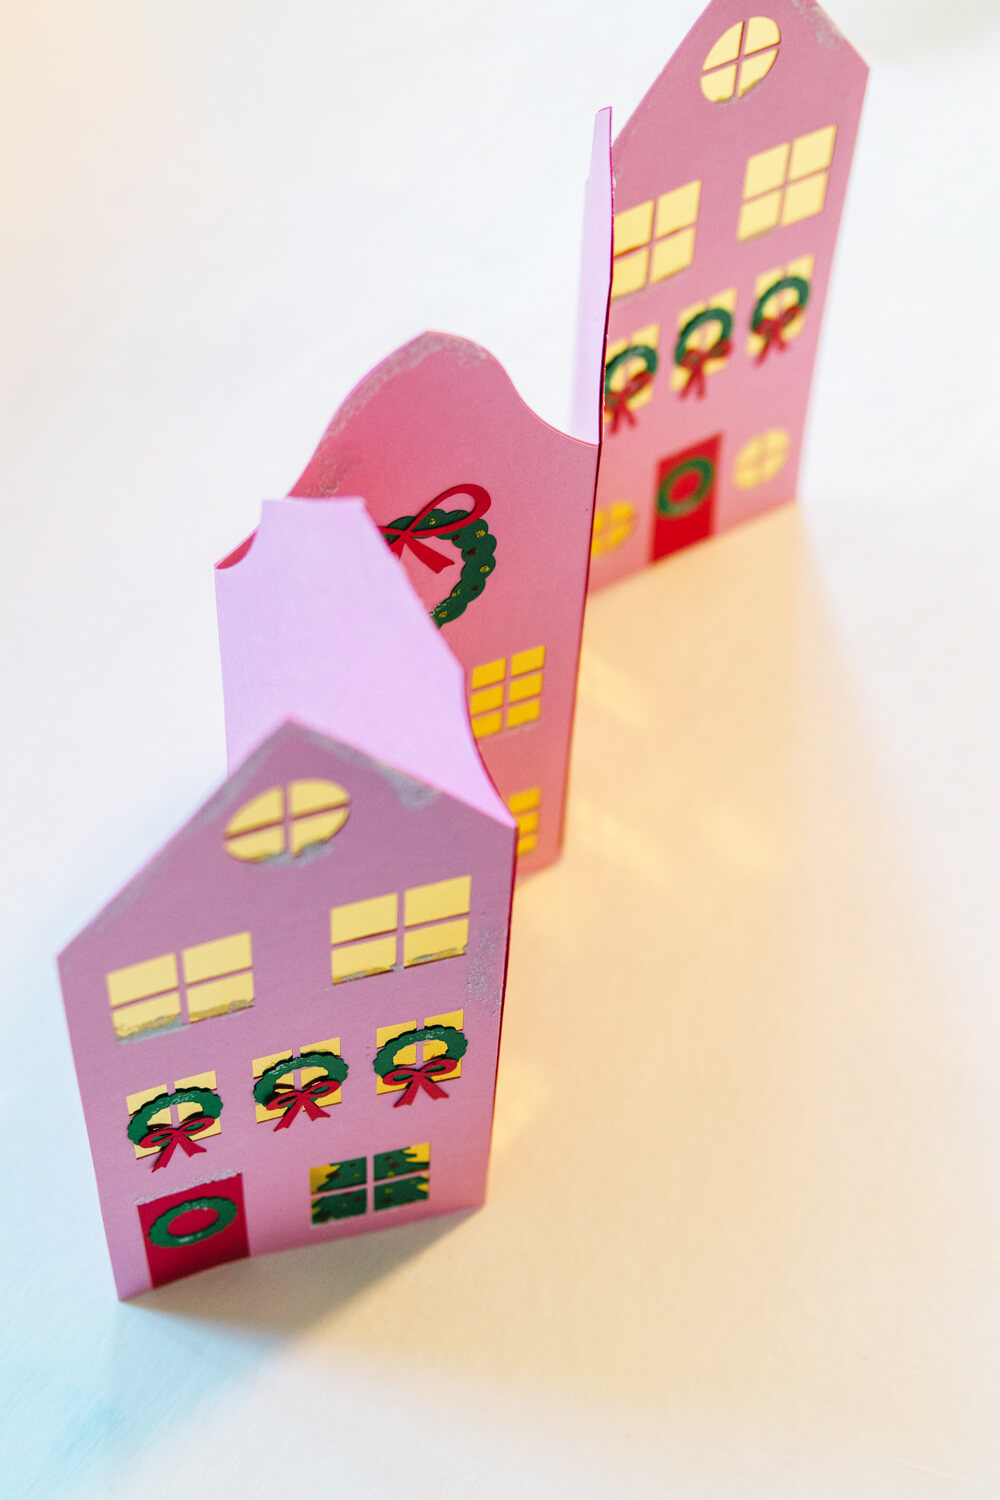
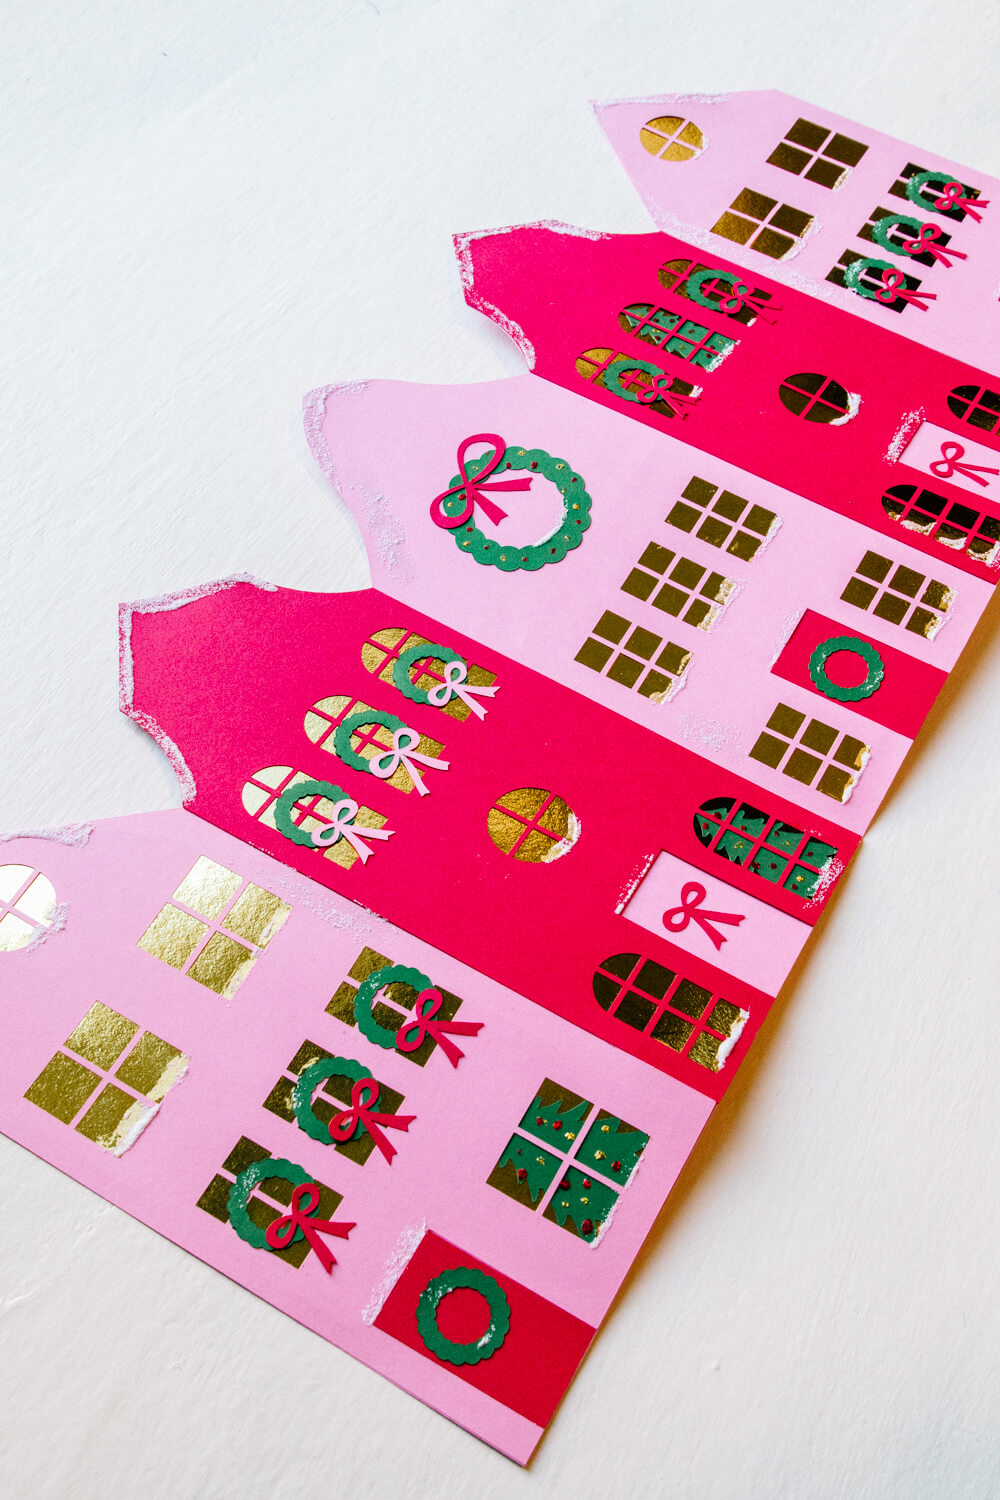
This Christmas village is designed as an accordion-style folded card that opens up to display a row of charming townhouses. When folded, it fits inside a standard letter-sized envelope. If you’d like something a little more special than a simple business envelope, you can also find my more decorative letter-sized envelopes in the Gilded Stork shop.

You can download the free Christmas Village Card SVG from the Gilded Stork Design Files Library and make your own!
Materials You’ll Need
- Cardstock in four coordinating colours including a gold foil cardstock
- Tape glue runner or a glue stick
- Fine glitter
- Glitter glue (or regular glue to mix with glitter)
- Cricut cutting machine
Understanding the Layers
I designed this Christmas village in four main layers. Once you understand how the pieces fit together, the assembly is quite straightforward.
1. The background layer
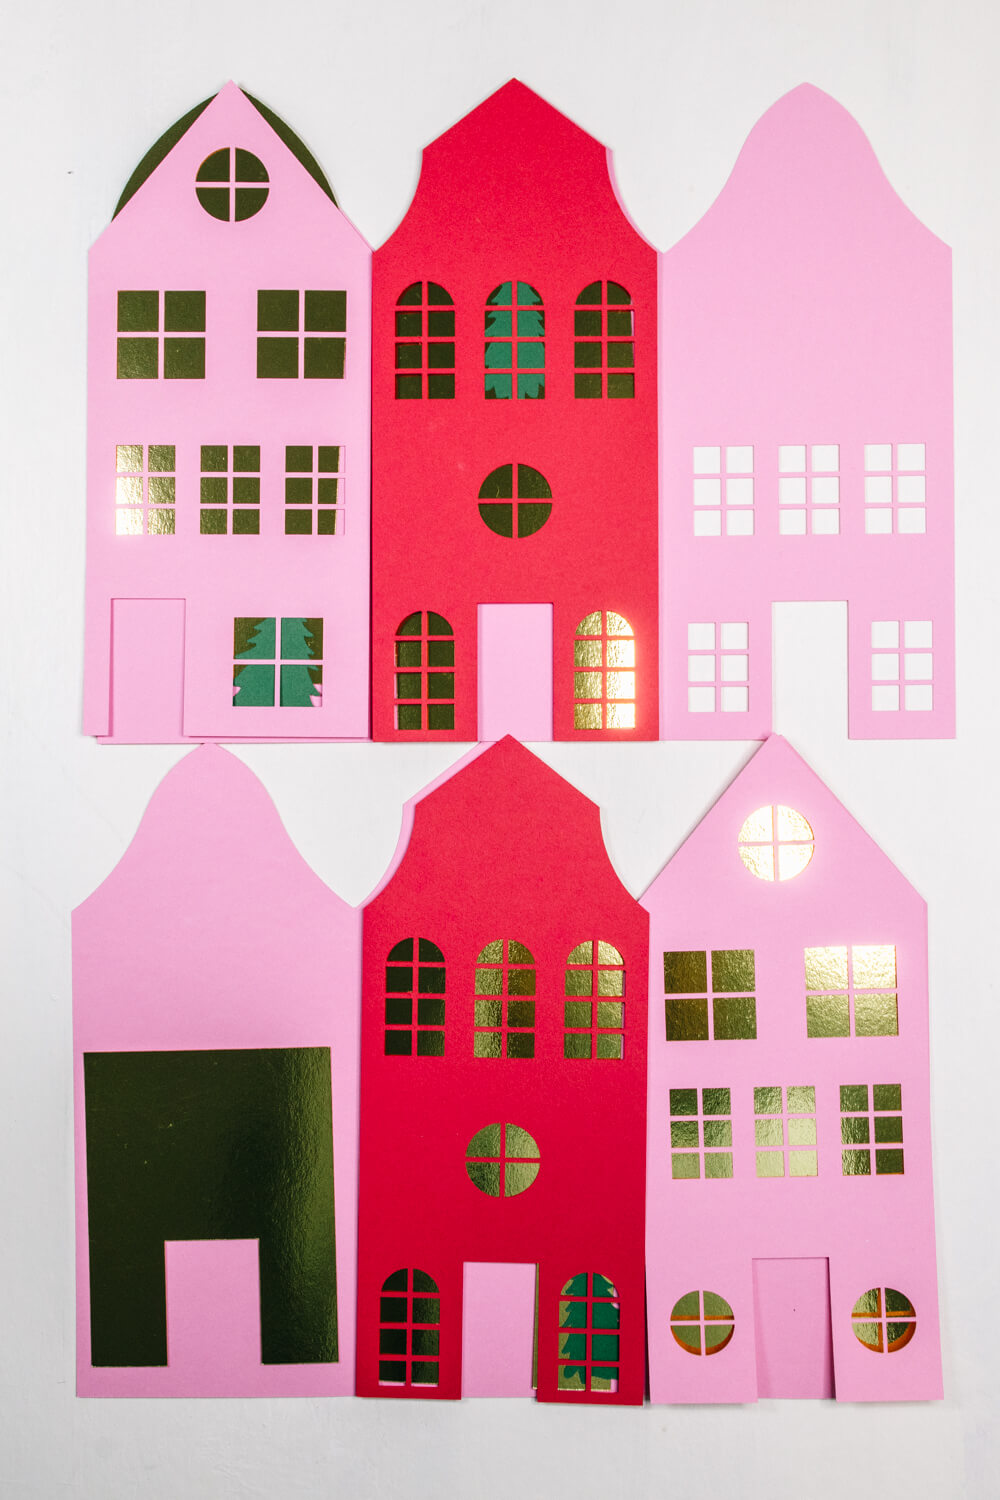
This is the base of your village, cut from cardstock. It consists of two 12 x 12″ pieces that are joined together, overlapping at the middle building to create one continuous accordion-style background.
2. The gold foil layer
This layer sits behind the windows and creates the appearance of warm, glowing lights coming from inside the buildings. You can also attach your little Christmas trees to this layer so they appear behind the windows.
3. The front building layer
This is the decorative outside layer of the buildings, with all the windows and architectural details cut out. The gold foil and Christmas trees will be sandwiched between this layer and the background.
4. The embellishments
The last layer is all about the little details! Christmas wreaths, bows, and glitter add a festive finishing touch and bring the village to life.
Preparing Your Christmas Village in Cricut Design Space
Upload the free SVG into Cricut Design Space. Before cutting, you’ll need to make one small adjustment.
The lines running vertically down the Christmas village are intended to be score lines rather than cut lines. Change these lines to score lines and attach them to the corresponding village background pieces. This will ensure that your Cricut scores the folds in the correct places rather than cutting through the cardstock.
Once everything is ready, cut out all the pieces.
Assembling Your Accordion Christmas Village
Once all your pieces are cut and scored, you can begin assembling your village. Here is how I put mine together:
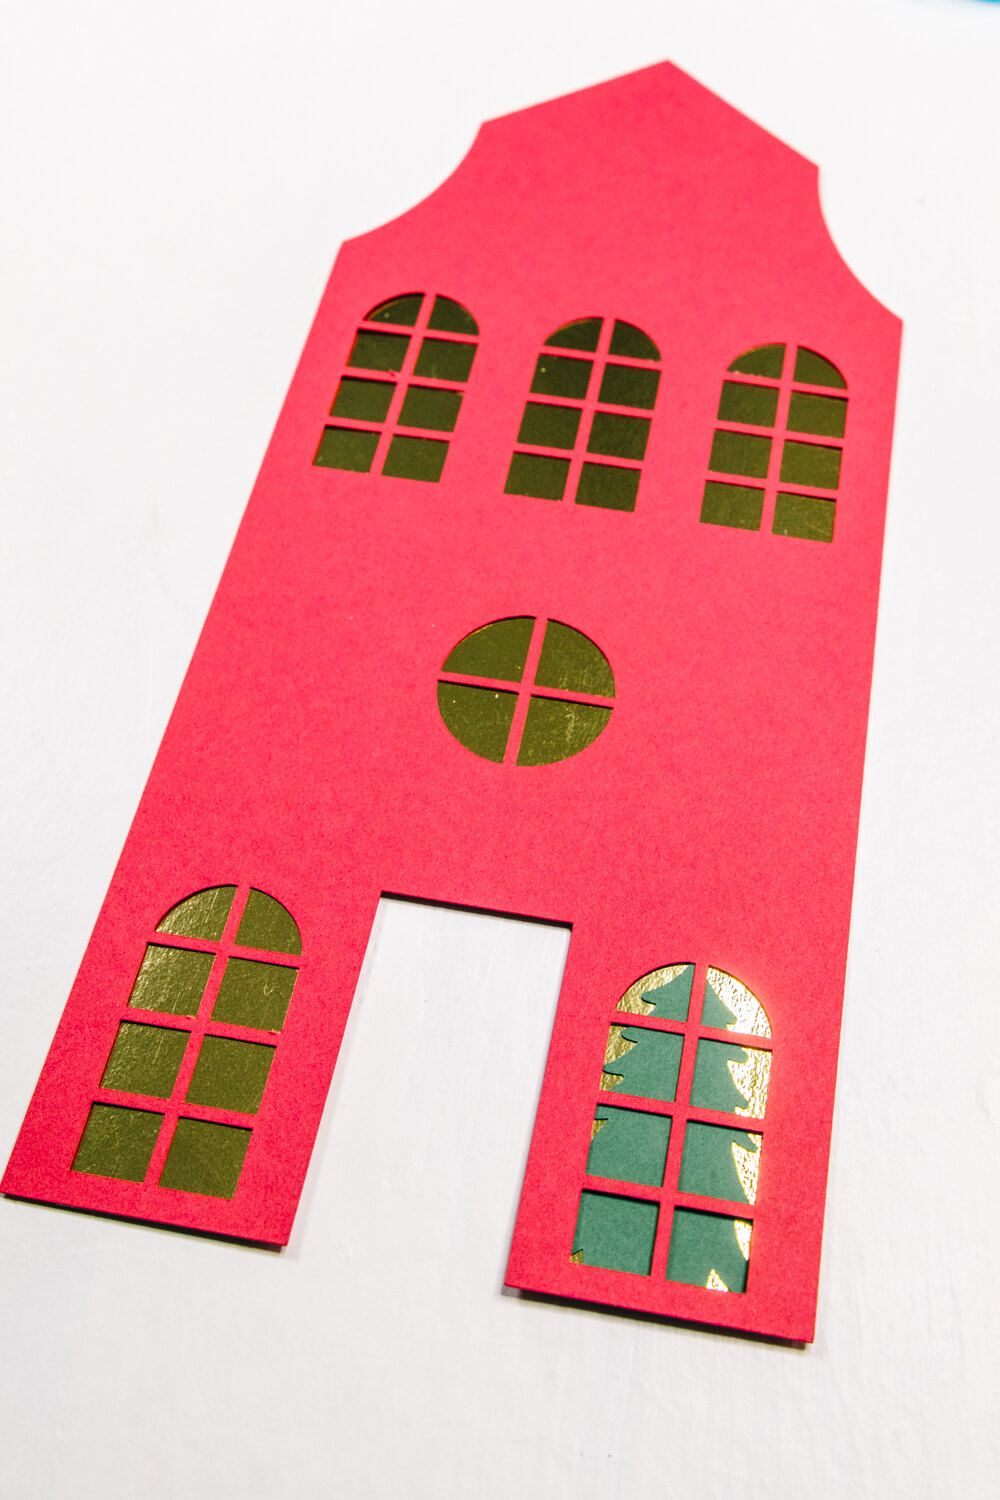
Step 1. Attach the Christmas trees to the gold foil.
Begin by adhering the little Christmas trees to the gold foil cardstock in the places where you want them to appear behind the windows.
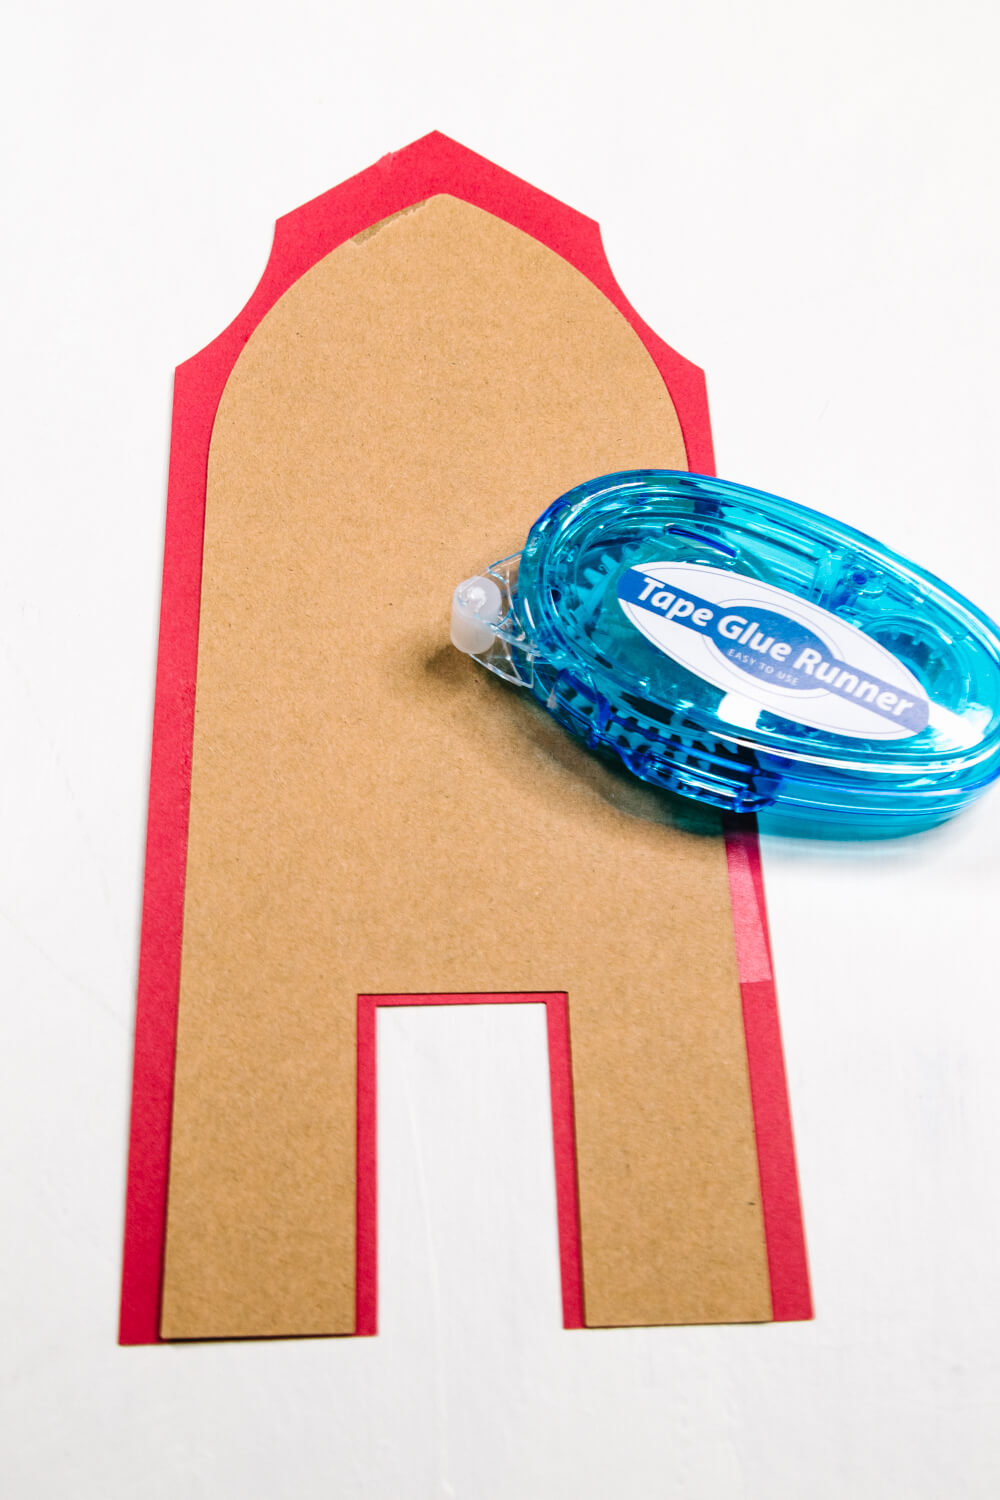
Step 2. Assemble the individual buildings.
For each of the four separate buildings, adhere the gold foil layer behind the window openings. The Christmas trees should be sandwiched between the gold foil and the front building layer, so they appear to sit inside the illuminated windows.
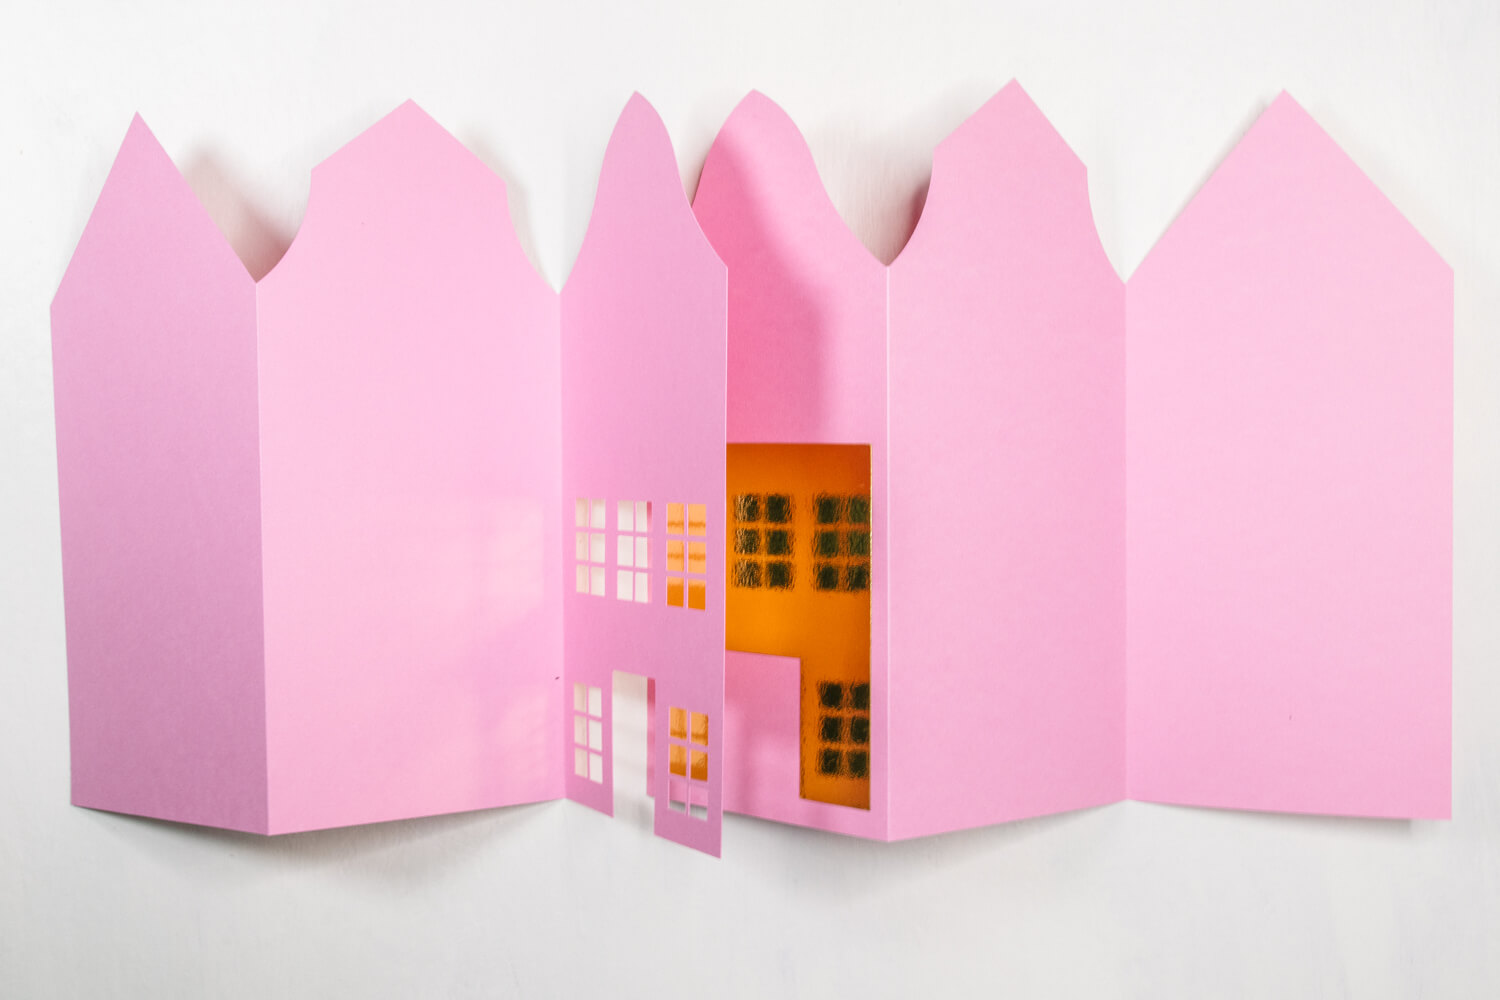
Step 3. Assemble the middle connecting building.
The building that joins the left and right sections of your Christmas village is a little different.
For this piece, first adhere the gold foil cutout to the right background section. Then place the front building layer (on the left cardstock) over top, just as you did with the other buildings. This will help create a continuous look across the entire village.
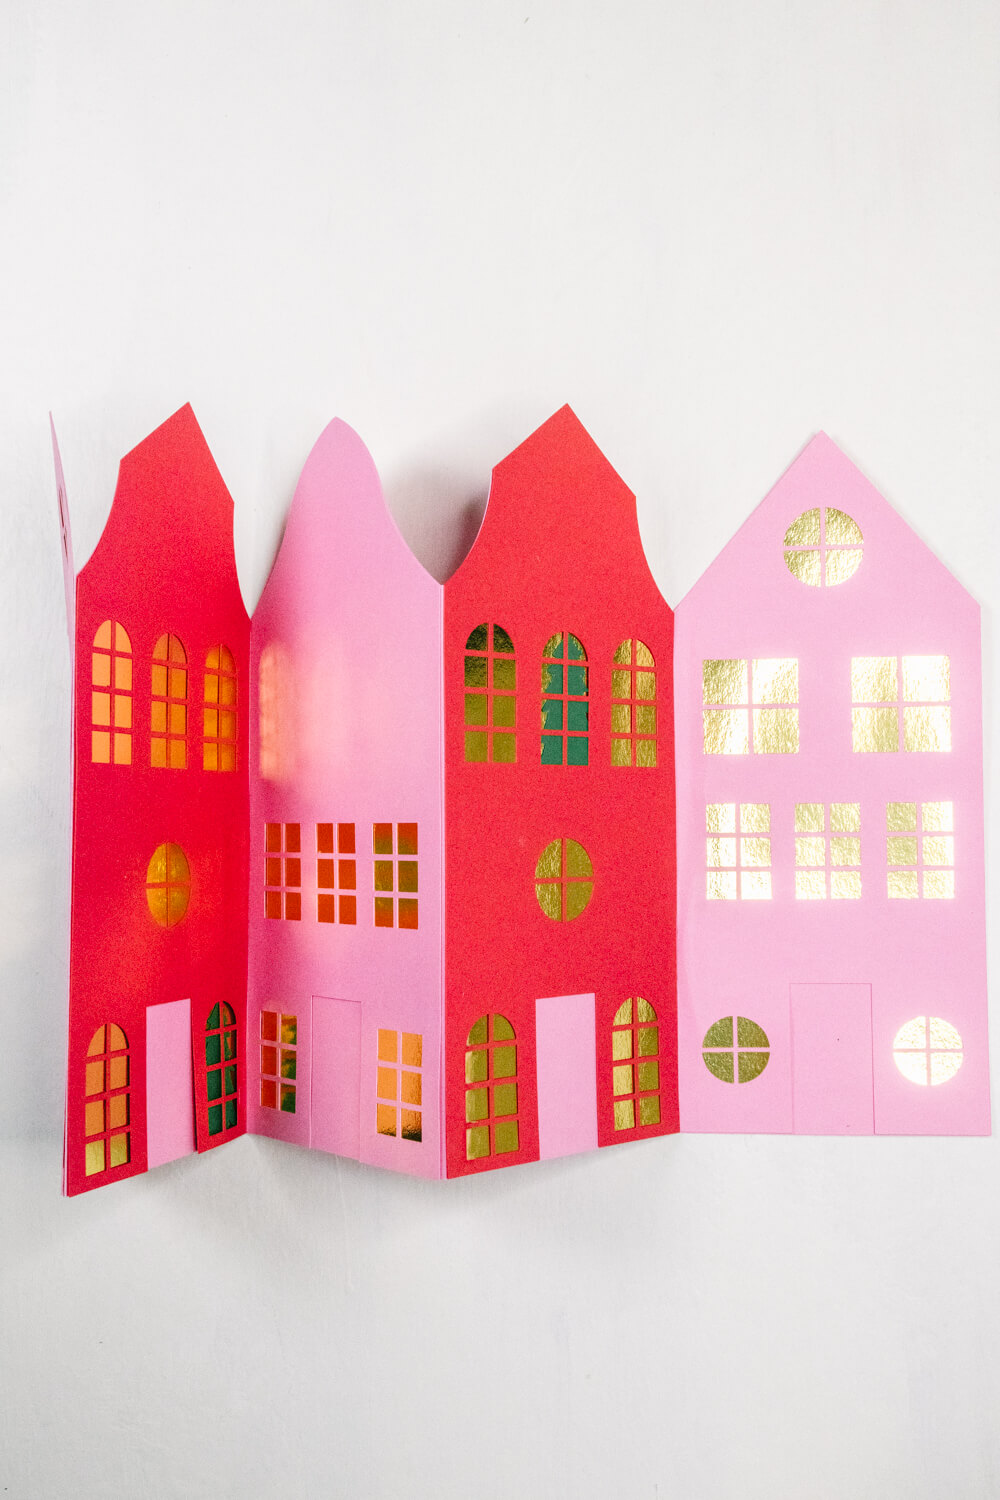
Step 4. Attach the front building layers.
Adhere the front of each building onto its corresponding background, sandwiching the gold foil and Christmas tree layers in between. Take your time lining up the buildings along the score lines.
Step 5. Fold the accordion card.
With all the layers assembled, carefully fold along the scored lines to create the accordion shape. You should now have a little row of connected Christmas townhouses that folds neatly into a card.
Adding the Christmas Details
Now for my favourite part: decorating!
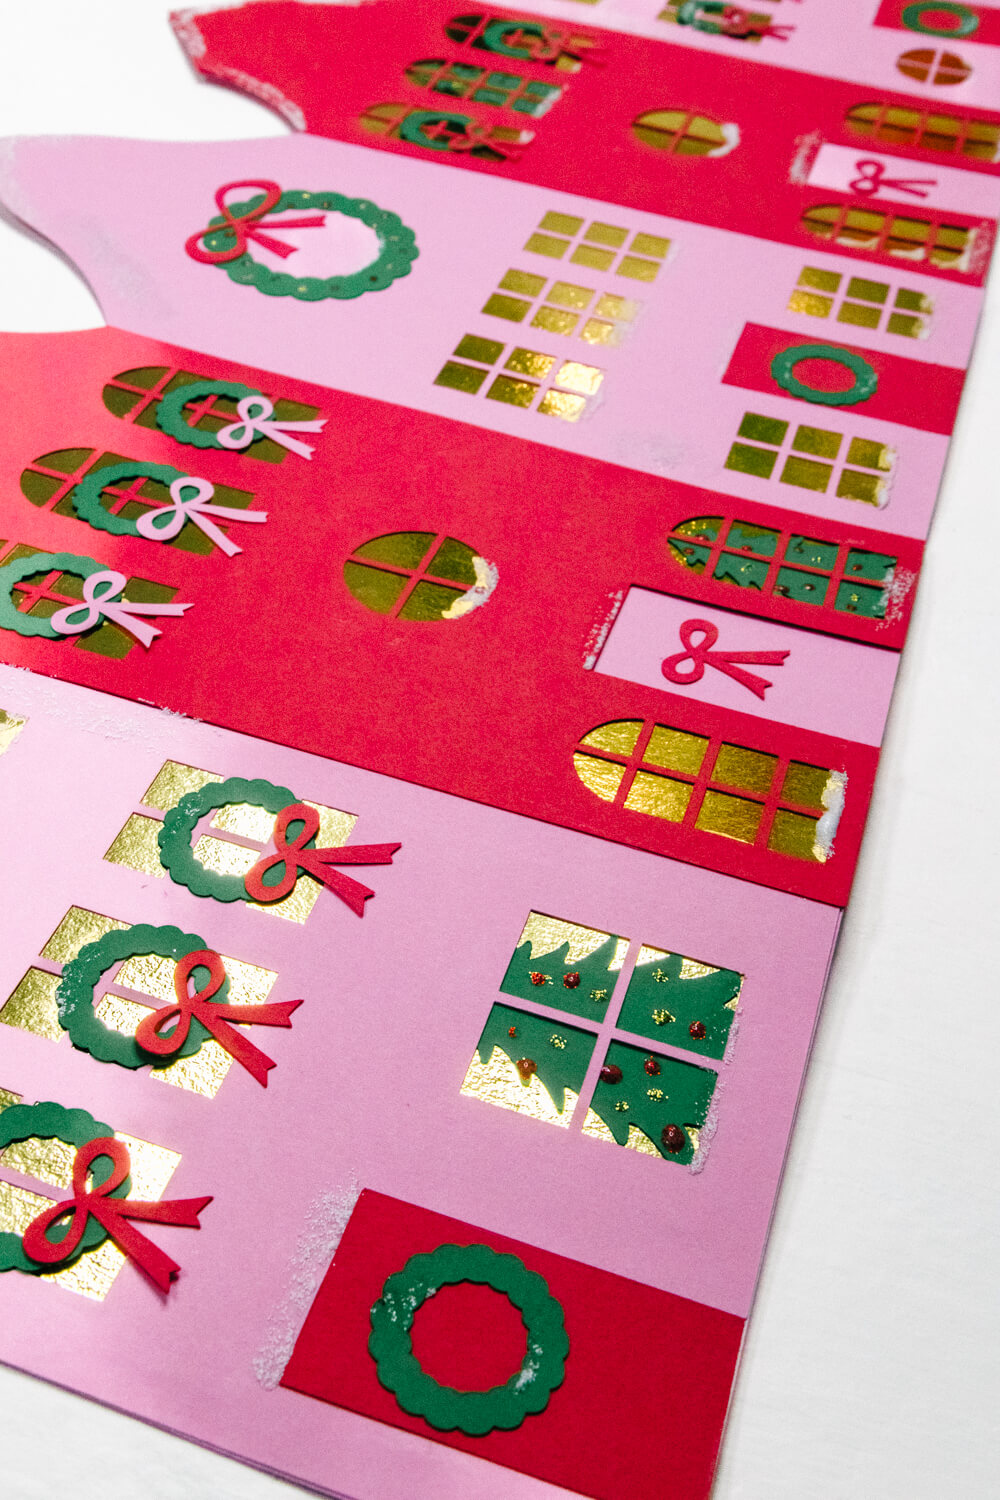
I added little Christmas wreaths and bows to the front of the townhouses, along with plenty of glitter to give the village a snowy, festive feel.
One of my favourite ways to add a little sparkle is to make my own glitter glue. Simply mix fine glitter into regular glue and use a small brush or applicator to add it wherever you’d like.
I used this mixture to create little snow-covered rooftops, adding it along the tops of the buildings, underneath the windowsills, above the doors, and in a few other places. I also used red and gold glitter glue to decorate some of the wreaths and Christmas trees.
There really isn’t a right or wrong way to embellish your village, so have fun with it and add as much or as little sparkle as you’d like!
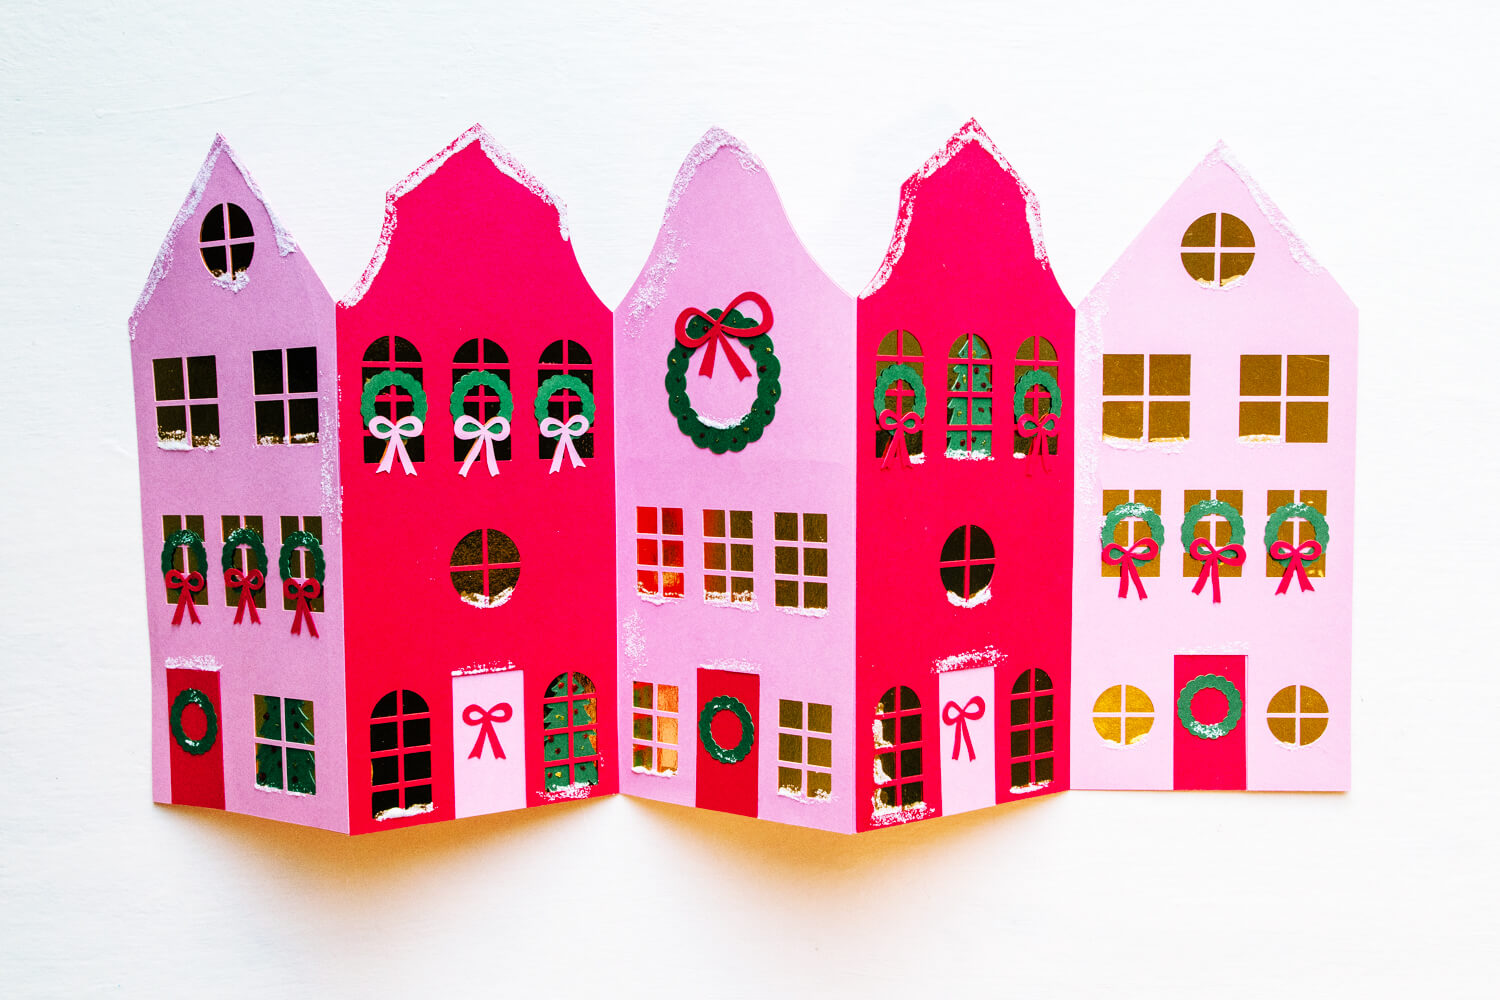
Allow all the glue and glitter to dry completely before folding your card closed.
And that’s it! Your accordion Christmas village card is ready to be tucked into an envelope and sent to someone special. I love how a few simple layers of cardstock can create such a charming little Christmas scene!